
Webhook Alerts
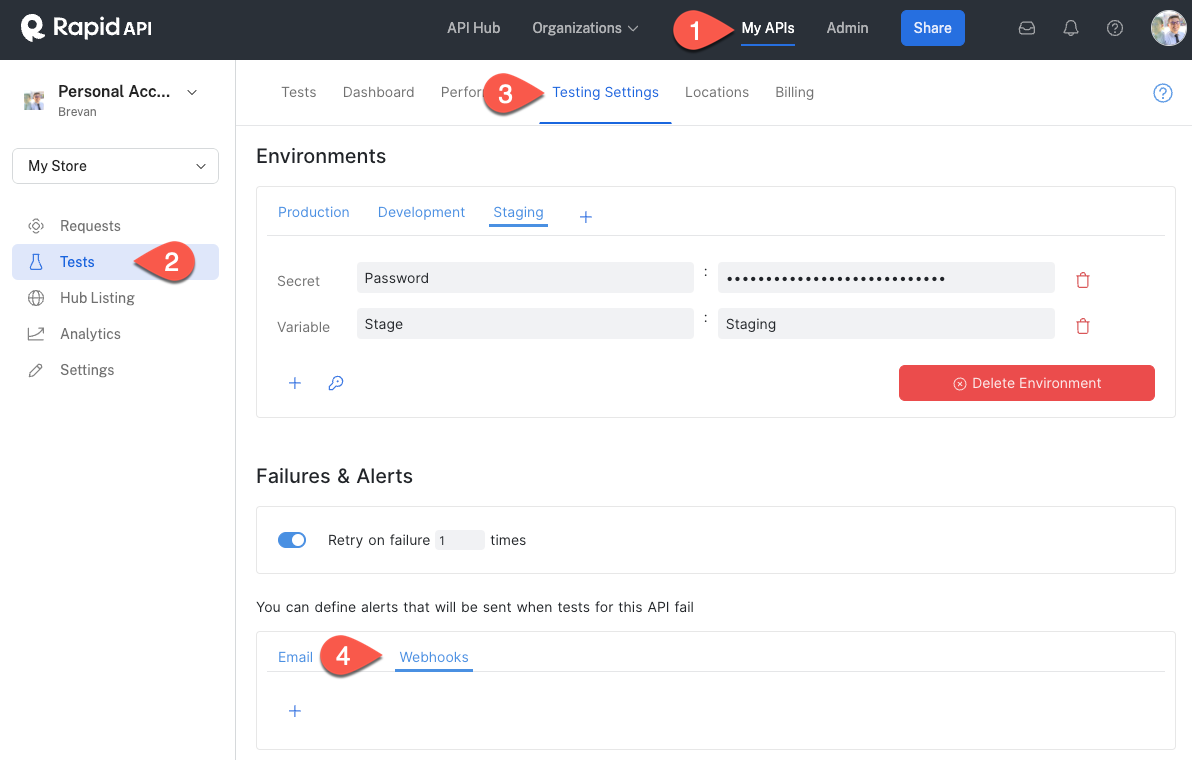
You can create webhook alerts to notify you when your API project's test(s) encounters an error, recovers from an error, or succeeds. To get started, navigate to Studio, select your API Project, select Tests, and then select Testing Settings.
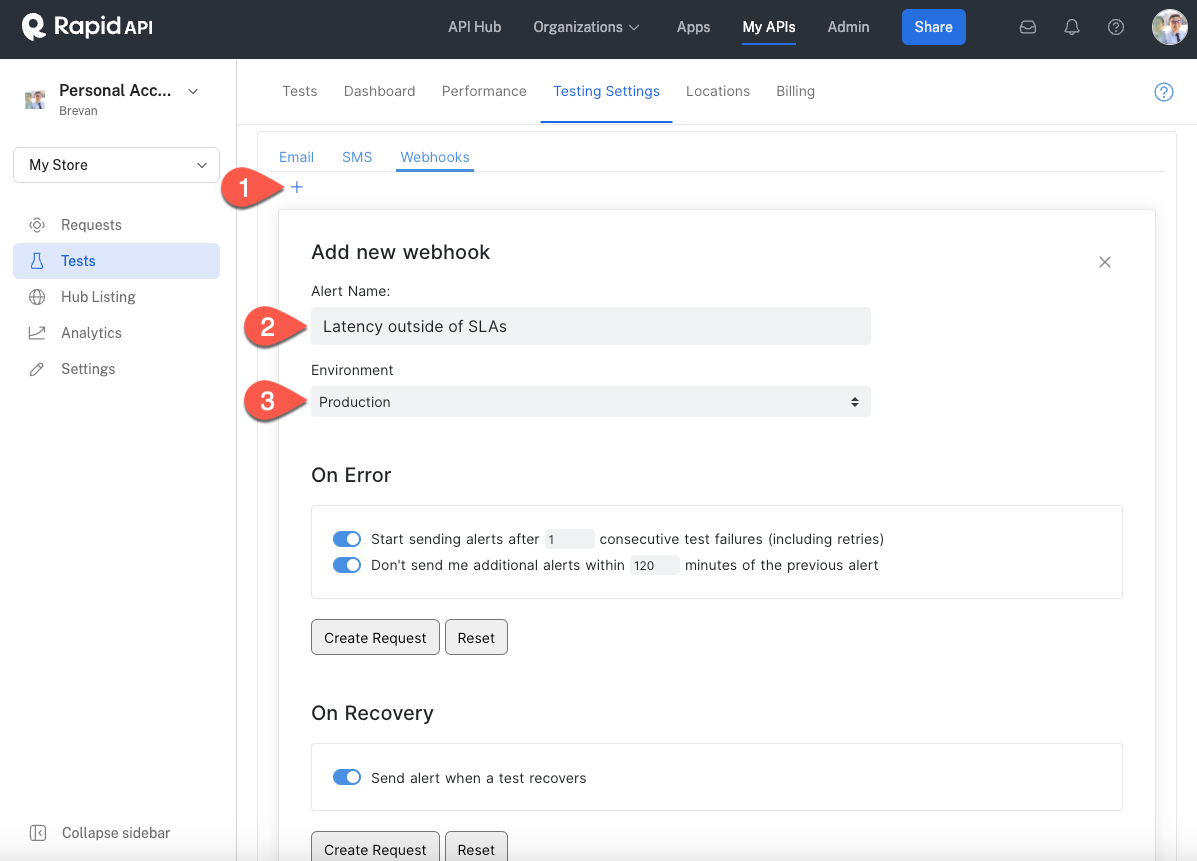
Create a new webhook alert by clicking +, entering an Alert Name, and selecting an Environment (optional).
Create Request
After configuring your alert types, there are a few simple steps to create a webhook alert:
-
Click the Create Request button below the alert type you want to configure.
-
Enter the endpoint URL, select the method, and add any custom Headers, Query, Body, and Auth data required for your incident management system, status page, or webhook endpoint. In the webhook's body, you can include information about the test using the {{}} variable nomenclature. See below for more details on variables that you can use.
-
Click Send to test your alert.
-
Once you have verified the alert is configured, click the Create Webhook button.
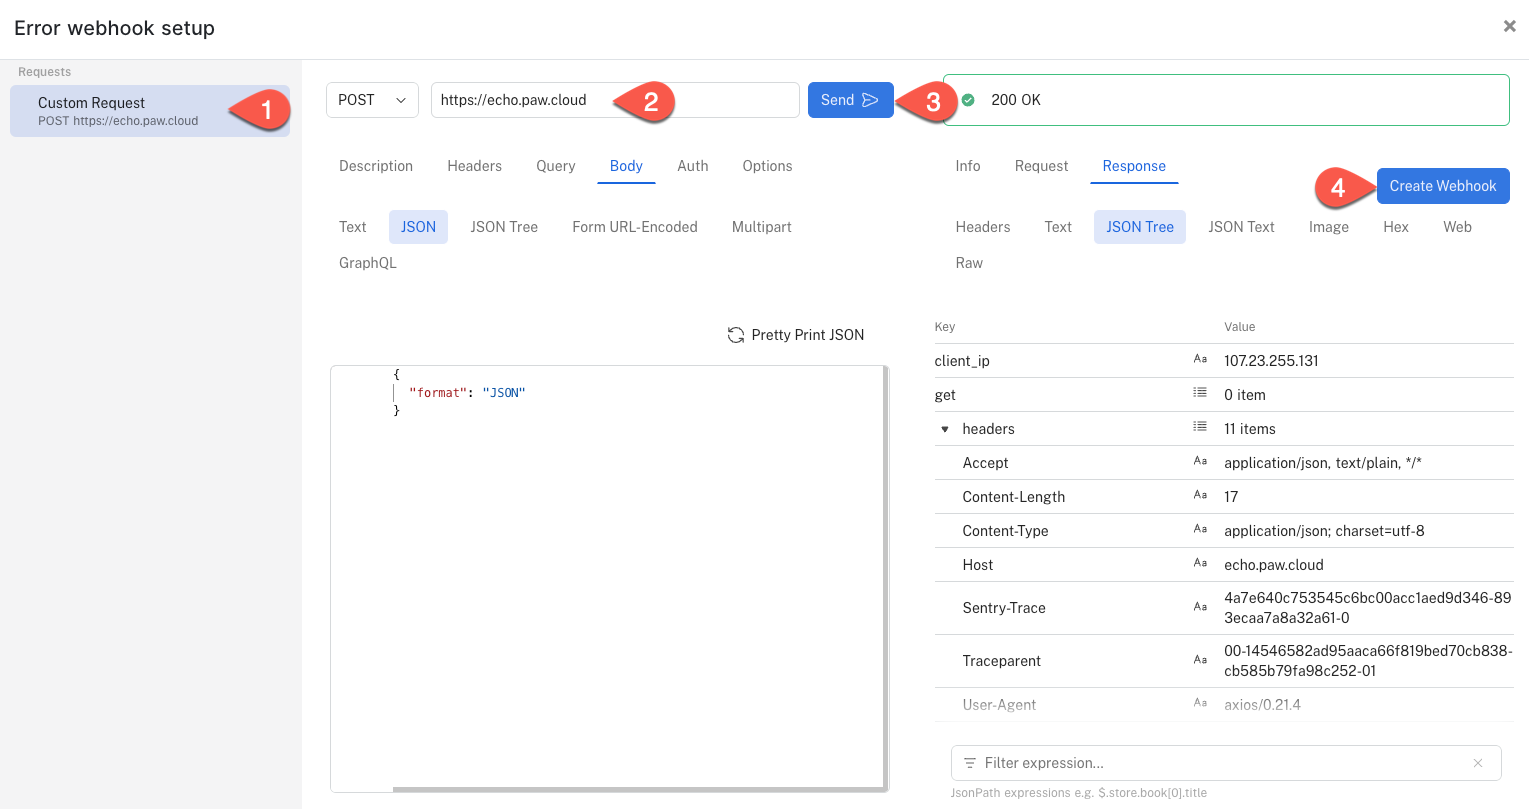
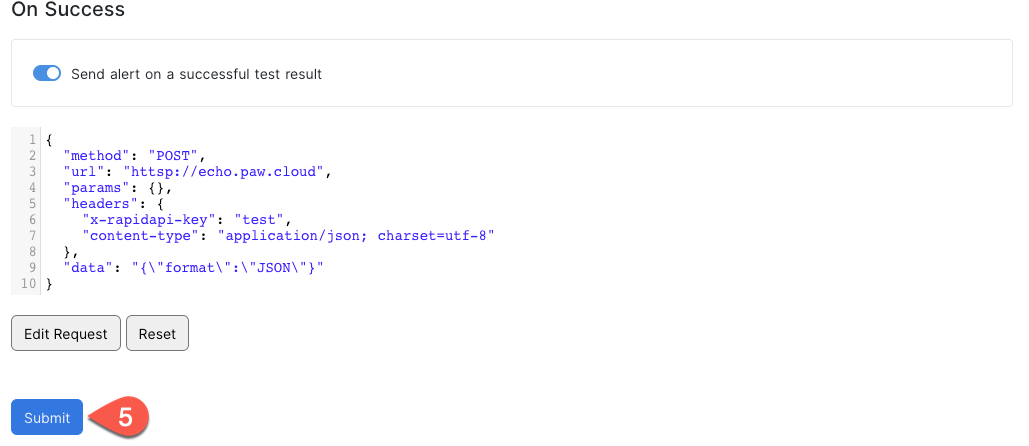
The JSON data for your request will be displayed under the alert type.
- Click the Submit button to save your request configuration.
Redirects are blocked in webhook alertsTo improve platform security, redirects are blocked in webhook alerts.
How to edit an existing alert
Click the Edit Request button to edit an existing alert configuration. This will reopen the webhook setup client for you to change the request.
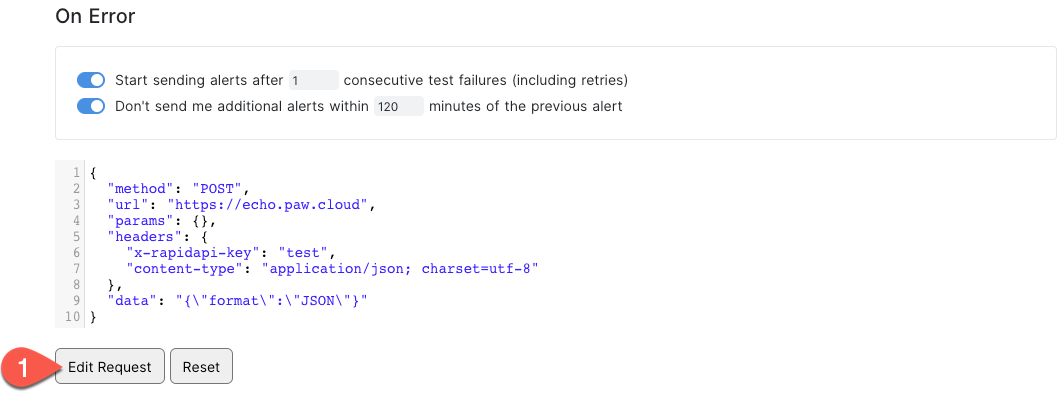
You can then edit or disable the alert as desired.
Reset
Clicking the Reset button under an alert type will clear the webhook JSON for that alert type. These changes are not saved until you click the Submit button.
Multiple webhook configurations
You may want multiple webhook configurations, one for each environment, or to trigger alerts to multiple endpoints.
You can create additional webhook alerts by clicking the + button in the Webhooks tab. Note that you can toggle each set of webhook configurations on and off.

Webhook content variables
- apiName. Name of the API.
- test.id. ID of the test.
- test.name. Name of the test.
- test.api. ID of the API.
- test.code. Code representation of the test.
- testExecution.id. Test execution ID.
- testExecution.status. Test execution status (completed, pending).
- testExecution.environment. Environment ID of the test execution.
- testExecution.location. Location of the test execution.
- testExecution.executionTime. The time it took to execute the test.
- testExecution.successful. Boolean on whether the test execution is successful.
- testExecution.computedStatus. Human-readable status of test execution.
- testExecution.executed. The time at which the test was executed.
- learnMoreUrl. URL to the Testing app containing detailed test execution report.
As an example, if you put the following in the body.
{
    "text": "{{test.name}} in {{apiName}} API has failed after {{testExecution.executionTime}} ms. This test was executed in {{testExecution.location}} location."
}
You will get the following in the webhook.
{
    "text": "Get Products Test in MyStore API has failed after 534 ms. This test was executed in Hong Kong location."
}
Updated about 1 year ago