
Data Fetch
Data Fetch steps are color-coded blue in the visual editor. Data fetch Steps consist of all of the HTTP Requests and the Database Connector step.
HTTP Get, Put, Patch, Post, Delete
All of the HTTP method steps have the same configuration options.
The URL field supports referencing Variables.
The Variable field sets the variable name that the request's response will be saved as for later reference. For example, if you set the variable for a request as firstRequest you could reference the status for that request using the variable name firstRequest.status.
URL Params are key-value pairs. URL parameters can be added to the request by clicking the + under the URL Params tab.

Headers are key-value pairs that can be added to your request. RapidAPI testing includes a standard list of header keys to choose from and also supports entering a custom key.

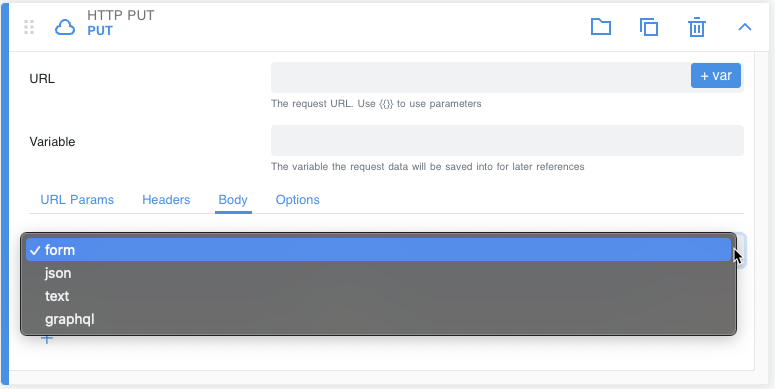
The request Body option is available on every HTTP request except GET. RapidAPI Testing supports the following four forms of body parameters: form, json, text, and graphql.
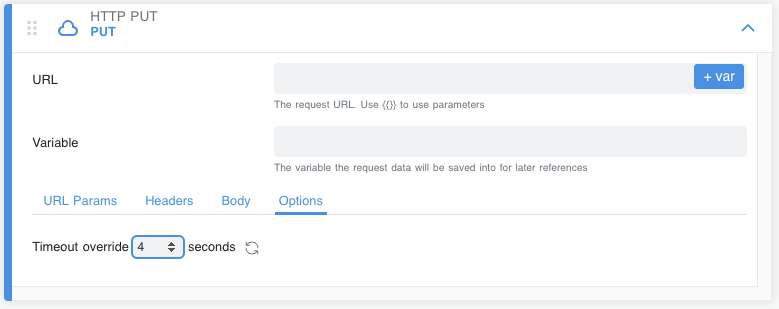
The Options tab allows you to select the length, in seconds, to wait for a request timeout.
Database Connector
Specific test scenarios may require you to pull information directly from your database into RapidAPI Testing. For example, you may want to validate that a GET request returns information that is consistent with what is in the database. Another example might be using data that closely matches your real-world records as test data.
RapidAPI Testing supports these scenarios through a “Database Connector” test step. In summary, this step allows you to do the following.
- Run a query against your database (you will supply the database information, credentials, and query).
- Use the query results as data for your subsequent test steps.
We currently support the following database types:
- MySQL
- PostgreSQL
- Microsoft SQL Server
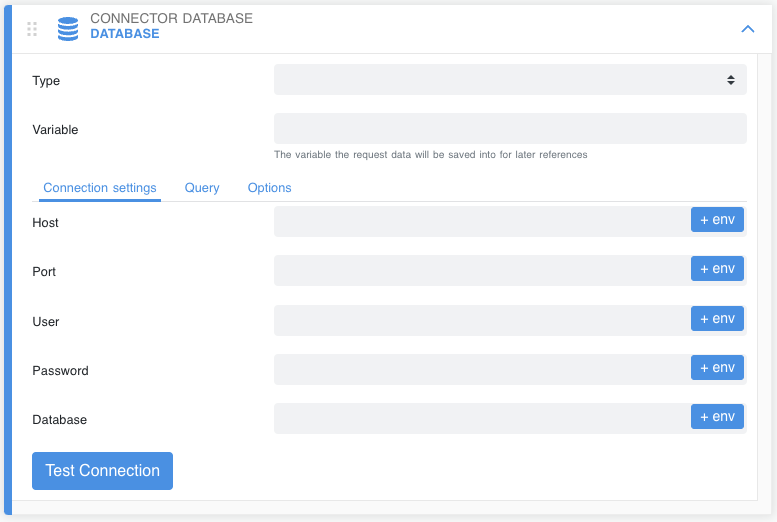
Enter the database information under the Connection settings tab. Use the Test Connection button to check if the connection to your database is successful. If successful, you will see a success mark next to it. Otherwise, you will see an error message. Note that the Database Connector step only supports using environment variables.
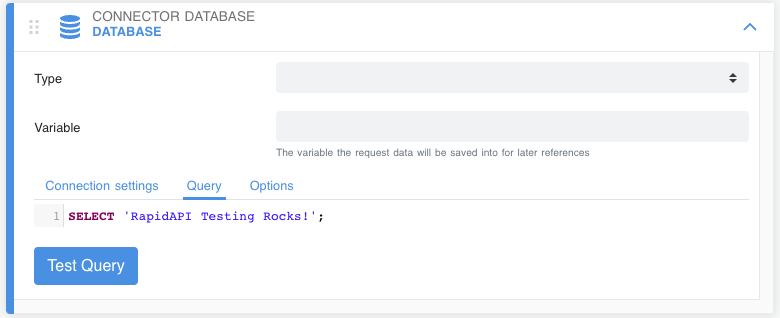
The Query tab is where you will enter your query. Once you have entered the query, you can hit “Test Query” to verify that the query is doing what you want it to do. You will see the results stored in the variable you defined in the variable field.
That is it! You are ready to use the query results through your defined variable in your subsequent steps.
Updated about 1 year ago