Apps and Authorizations (GQL)
List the apps owned by teams in an organization
Please see Organizations (GQL).
List the apps owned by a team
Please see Users, Teams, and Roles (GQL).
List the apps owned by a user
Apps are know as "projects" in the GraphQL Platform API. The following query lists the apps owned in a user's Personal Account. The app IDs are returned as ProjectACLs.Project.id.
You must pass in a user ID as a variable. To obtain a user ID, see Get a User's Details.
Current user onlyThis query only works for the current user. You currently can not list another user's apps using this query. If you would like to list another user's app, please use the REST Platform API. See Example: Obtaining apps and keys for users and teams.
query User($id: ID!) {
  user(id: $id) {
      username
      email
      numOfProjects
      ProjectACLs{
        Project{
          name
          id
         }
      }
    }
}
{
"id": "5713300"
}Create an app
Here you create an App (called a "project" in the GraphQL Platform API). For details on obtaining a TEAM ID or USER ID, see Users, Teams, and Roles (GQL).
mutation CreateProject($project: ProjectCreateInput!) {
 createProject(project: $project) {
   id
   name
   description
 }
}
{
"project": {
"projectOwner": YOUR_TEAM_ID_or_USER_ID,
"projectName": "YOUR_APPLICATION_NAME",
"description": "YOUR_APPLICATION_DESCRIPTION"
}
}List an app's authorizations
An application contains one or more authorizations. Authorizations are of two main types:
- A standard RapidAPI authorization containing a
x-rapidapi-key. - An authorization containing header, BASIC, or OAuth credentials.
This query lists the details of the authorizations in an application. You must pass the application's id (also known as a projectId) in the variables.
For standard RapidAPI authorizations, the returned key value contains the x-rapidapi-key for the authorization. To obtain a list of authorizations for a team's app, the x-rapidapi-identity-key must contain the personal x-rapidapi-key of a user on the team. For more information, see Authorization (GQL).
query ApplicationAuthorizations($projectId: ID!) {
  applicationAuthorizations(where: {projectId: $projectId}) {
    id
    createdAt
    key
    name
    applicationId
    authorizationType
    authorizationValues
    grantType
    gateways {
      id
      dns
      __typename
    }
  __typename
  }
}
{
"projectId": 2646677
}Once you have an authorization id (returned from the query above), you can use it to obtain details of the authorization with the applicationAuthorization query. This query can return the same authorization details as the query above.
query ApplicationAuthorization($authId: ID!) {
  applicationAuthorization(id: $authId) {
    id
    key
    name
  }
}
{
"authId": "5307813"
}Create an app authorization
The createApplicationAuthorization mutation can be used to create standard X-RapidAPI-Key authorizations or authorizations for APIs that do not use the Rapid Runtime. Both are shown below.
Create a X-RapidAPI-Key authorization
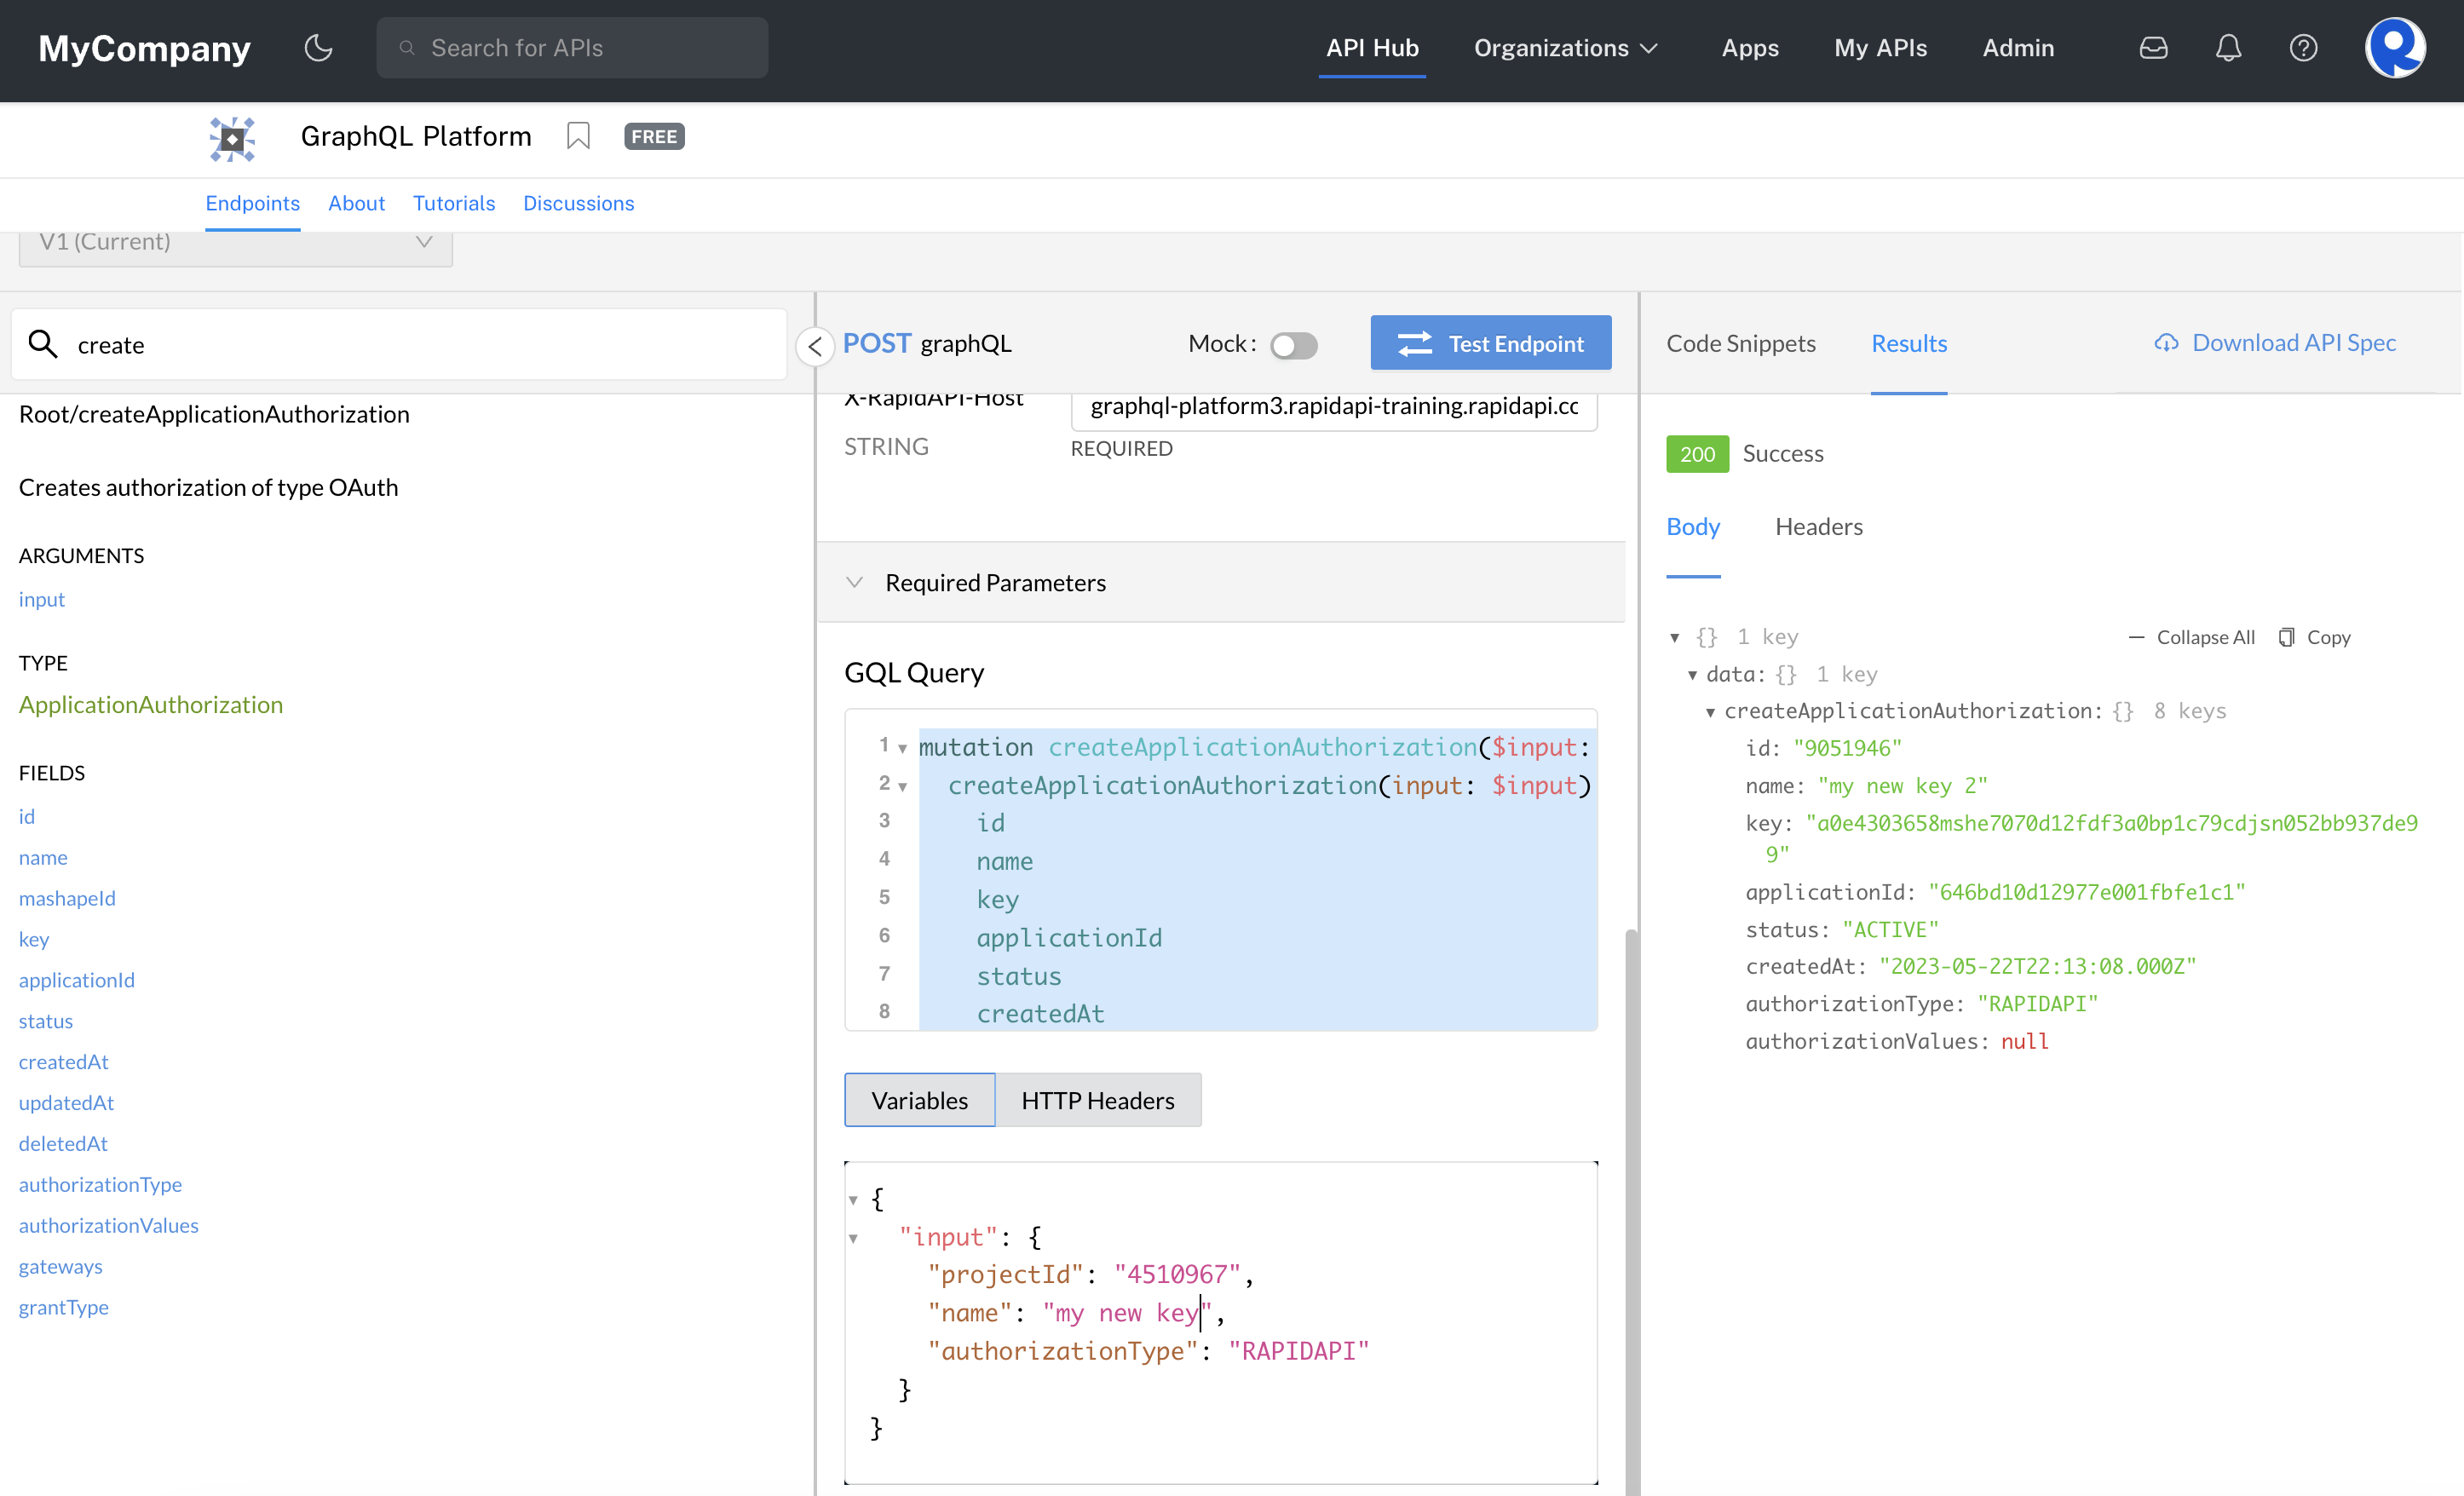
To create an X-RapidAPI-Key authorization, use the createApplicationAuthorization mutation. You must specify the projectId, which is the same as that appId above. Specify a name for your authorization. For authorizationType, specify RAPIDAPI. This will create a read-only X-RapidAPI-Key in the app.
query ApplicationAuthorization {
  applicationAuthorization(id: "5307813") {
    id
    key
    name
  }
}
{
"input": {
"projectId": "4510967",
"name": "my new key",
"authorizationType": "RAPIDAPI"
}
}
Creating a X-RapidAPI-Key using mutation.createApplicationAuthorization.
Create a non-Rapid authorization
This mutation adds an Authorization to an App. You must specify YOUR_GATEWAY_ID, which can be found with the following query:
query GatewayInstances {
  gatewayInstances {
    edges {
      node {
        id
        dns
      }
    }
  }
}
Save YOUR_GATEWAY_ID (called "id" in the response) to be used in the following mutation.
mutation CreateApplicationAuthorization($input: AppAuthorizationCreateInput!) {
  createApplicationAuthorization(input: $input) {
    id
    name
    applicationId
    status
    createdAt
    authorizationType
    authorizationValues
  }
}
Use the Variables below with your mutation.
Two example Variables objects are provided below. The first case is for the OAuth2 CLIENT_CREDENTIALS grant type. You could also use a value of AUTHORIZATION_CODE for the grantType field. In that case, the clientSecret is optional.
The second example shows the Variables object for a Header Auth authorization.
{
  "input": {
    "projectId": "YOUR_PROJECT_ID",
    "name": "YOUR_AUTHORIZATION_NAME",
    "authorizationType": "OAUTH2",
    "authorizationValues": "{\"clientId\":\"YOUR_CLIENT_ID\",\"clientSecret\":\"YOUR_CLIENT_SECRET\"}",
    "gatewayIds": [YOUR_GATEWAY_ID],
    "grantType": "CLIENT_CREDENTIALS"
  }
}
{
"input": {
"projectId": "123456",
"name": "my new authorization",
"authorizationType": "HEADER",
"authorizationValues": "[{\"headerName\":\"auth1\",\"headerValue\":\"auth1pass\"}]",
"gatewayIds": [
1234
]
}
}Here is a Node Axios version of the createApplicationAuthorization mutation:
const axios = require("axios");

const URL = "https://YOUR URL.p.rapidapi.com/";
const HOST = "YOUR HOST.rapidapi.com";
const TEAMORUSERKEY = "YOUR ID"; // API key from your calling context
const USERKEY = "YOUR ID"; // needed if calling the Platform API from a team context - it is the API key from your Personal Account
const PROJECTID = "YOUR PROJECT ID"; // this is the app id
const AUTHNAME = "YOUR AUTHORIZATION NAME";
const CLIENTID = "YOUR CLIENT ID";
const CLIENTSECRET = "YOUR CLIENT SECRET"; // optional for AUTHORIZATION_CODE grant types
const GATEWAYIDARRAY = [YOUR GATEWAY ID]; // keep the brackets - it is a single value array
const GRANTTYPE = "CLIENT_CREDENTIALS"; // or "AUTHORIZATION_CODE

const options = {
  method: "POST",
  url: URL,
  headers: {
    "content-type": "application/json",
    "X-RapidAPI-Key": TEAMORUSERKEY,
    "X-RapidAPI-Host": HOST,
    "x-rapidapi-identity-key": USERKEY,
  },
  data: {
    query: `mutation CreateApplicationAuthorization($input: AppAuthorizationCreateInput!) {
  createApplicationAuthorization(input: $input) {
    id
    name
    applicationId
    status
    createdAt
    authorizationType
    authorizationValues
  }
}`,
    variables: {
      input: {
        projectId: PROJECTID,
        name: AUTHNAME,
        authorizationType: "OAUTH2",
        authorizationValues:
          '{"clientId":"' + CLIENTID + '","clientSecret":"' + CLIENTSECRET + '"}',
        gatewayIds: GATEWAYIDARRAY,
        grantType: GRANTTYPE,
      },
    },
  },
};

axios
  .request(options)
  .then(function (response) {
    console.log(JSON.stringify(response.data));
  })
  .catch(function (error) {
    console.error(error);
  });
After executing the createApplicationAuthorization mutation, your Authorization will be saved to the App.
Update an app authorization's name
To update an authorization's name, use the updateApplicationAuthorization mutation. You must specify the authorization id, which is returned in the query above. Specify a new name for your authorization.
mutation UpdateApplicationAuthorization($input: AppAuthorizationUpdateInput!) {
  updateApplicationAuthorization(input: $input) {
    id
    name
    key
    applicationId
    status
    createdAt
    authorizationType
    authorizationValues
  }
}
{
"input": {
"id": "9051946",
"name": "my new name"
}
}Delete an app authorization
To delete an authorization, use the deleteApplicationAuthorization mutation. You must specify the authorization id, which is returned in the query above. The mutation returns true if the authorization was deleted.
mutation deleteApplicationAuthorization($id: ID!) {
  deleteApplicationAuthorization(id: $id)
}
{
"id": "9051946"
}Updated 8 months ago