
Executing Your Rapid Tests Locally
Context
By default, you can execute your Rapid Testing tests on our cloud via one of the available global AWS locations. This should suffice for most of your use cases.
However, there are cases in which you may need to execute tests locally. For example, you may need to test changes that only exist locally on your machine through “localhost” APIs. You may also need to run queries on a local database.
You can achieve this by installing + running Rapid Testing “workers” on your machine. This will allow your tests to be executed locally.
How does that work?
- Default worker locations. When you run a Rapid Testing test (through the UI, via the webhook, or from the schedule), the test is queued for execution at a specific location that you selected. The worker responsible for the location would then pick up the test from the queue, execute it, and report the results of the execution.
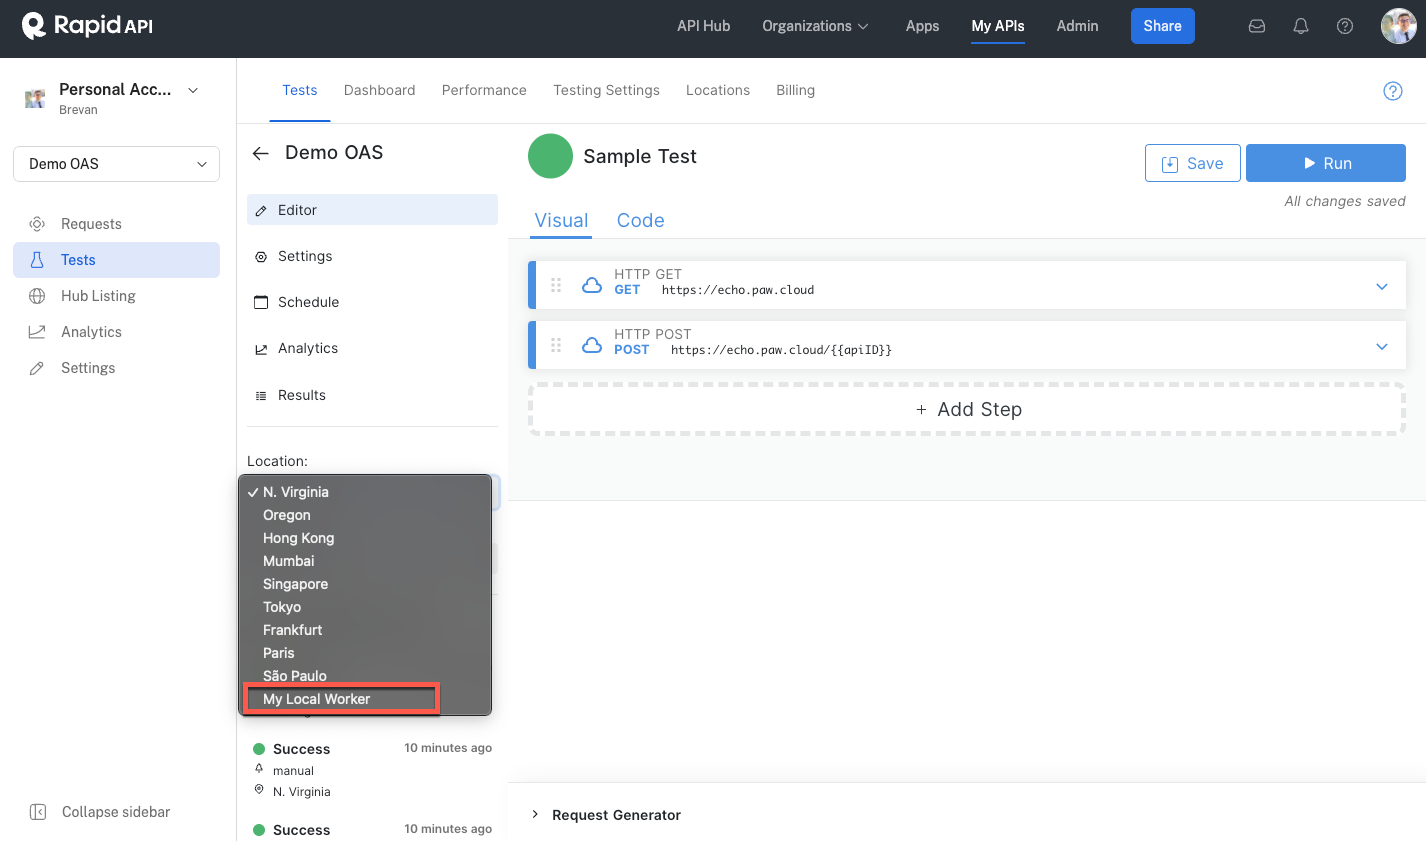
- Custom worker as a location. When you want to run tests locally on your machine, you will be adding a new worker as a location into your account. Once the worker is running on your machine (see below on how to set it up), the worker will know to pick up tests from the correct queue, execute them, and report back the results, similar to how our default workers would.
How can I set up a custom worker?
First, you want to download and install one of the Rapid testing workers [available through NPM or [Docker] (https://hub.docker.com/r/rapidapicloud/testing-worker)].
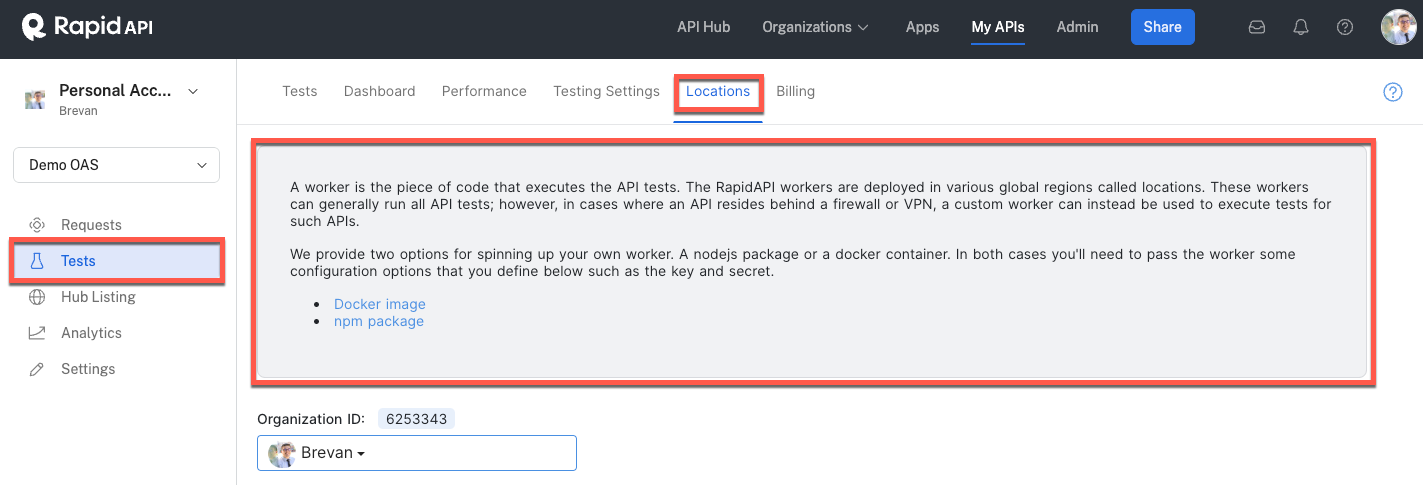
Then, you want to add a new worker to your account through the Locations page. Please remember to select the correct organization context where you want your worker to be available, and if the organization has multiple teams, navigate to the correct team.
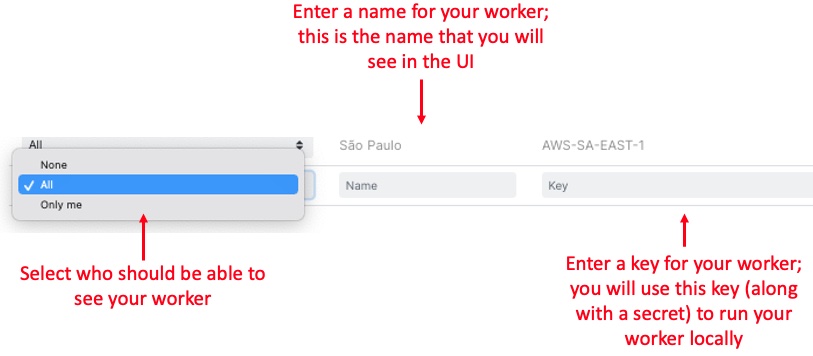
After you have added a new worker, you will be able to see the new secret for your worker, along with a sample command of how to run your worker on your machine; you will want to store this secret in a safe place (please don’t lose this key as it appears only once; you will need to re-create the worker if you lose it).
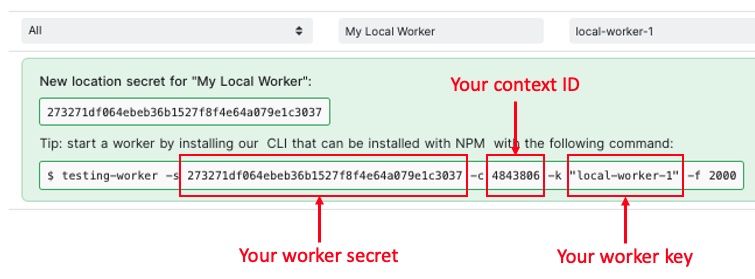
Now, you are ready to run the worker command on your machine. Use the command from the sample above to get started.
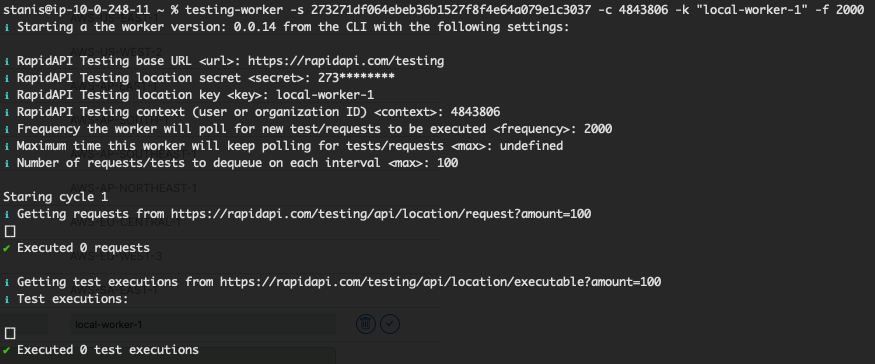
You are done! Now you can run a test with the new worker as a location.
Options for your custom worker
Below are all the options that you can specify for your worker.
-s, --secret <secret>(Required). Location secret from which the worker will fetch executions. This is the location secret that you will use to add the worker to the UI.-k, --key <key>(Required). Location key for fetching executions. Must match secret.-c, --context <context>(Required). For APIs in the personal context, use your personal context ID. For organization APIs, use the team context ID.- API context (user ID or organization ID) for fetching executions.
-f, --frequency <frequency>(Optional; default is undefined). Frequency in which the worker should fetch new test executions, set as period interval in ms. For example, setting frequency as 5000 ms means that new tests will be fetched every 5000 ms. If the frequency is undefined (as is the default), the worker will only fetch new tests once. Please note that with frequency less than 2000 ms, you may get 429 (rate limiting) errors.-m, --max <max>(Optional; default is undefined). The amount of time in ms that the worker is going to be active. For example, setting max as 10000 ms means that the worker will be active for 10000 ms, and then exits. Any tests triggered after the worker exists will not be executed until a new worker is started. If max is undefined (as is the default), the worker will continue to run until the process is terminated.-u, --url <baseUrl>(Optional). The base URL to fetch executions from (default: "https://rapidapi.com/studio")-b, --batch <batch>(Optional; default is 100). You can use this to control the number of test executions to process on each interval.-V, --versionRetrieve the version number.-h, --helpDisplay help content for the command.-l, --loggingUse "on", "off" or "cli". "cli" will show additional information at start up.--ignore-sslIgnore missing SSL certificates for https requests.
Updated about 1 year ago