CI/CD Integration
In some cases, you may want to trigger the execution of your tests remotely. For instance, if you want to integrate your RapidAPI tests into your CI/CD workflow, you need to trigger the execution of your tests from within your CI/CD platform. The easiest way to do this is using the test trigger webhook.
Where can I find my test trigger webhook?
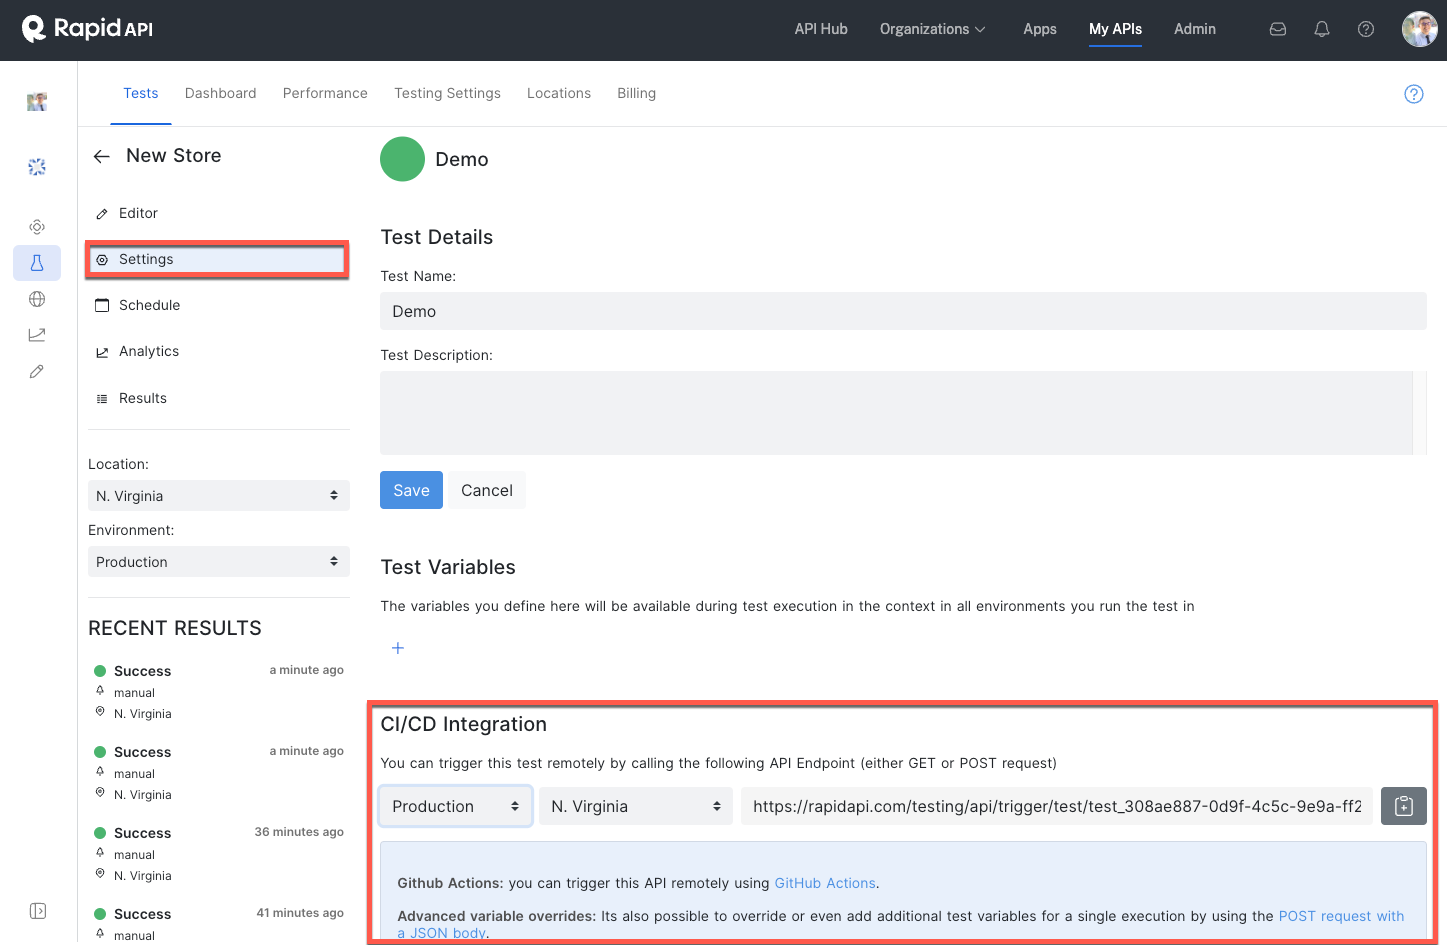
- Navigate to the Settings page of the test that you want to trigger remotely
- Scroll to the CI/CD Integration section on your Settings page. This section will help you determine the URL you will use to trigger your test. Start by selecting the environment (optional) and location you want your triggered test to run. The URL will dynamically update to include the correct environment and location details.
- Make a request to the URL (either GET or POST), and you will see that the test will be queued for execution.

Interpreting the trigger response
Due to the nature of API tests taking an inconsistent range of time to complete, the test trigger webhook is asynchronous. This means that you must first send a request to start the test and a second request, when the test is complete, to determine the status of the test. If you send a request to determine the status of the test, and it is not yet complete you will receive a response with the value of in progress in the status field.
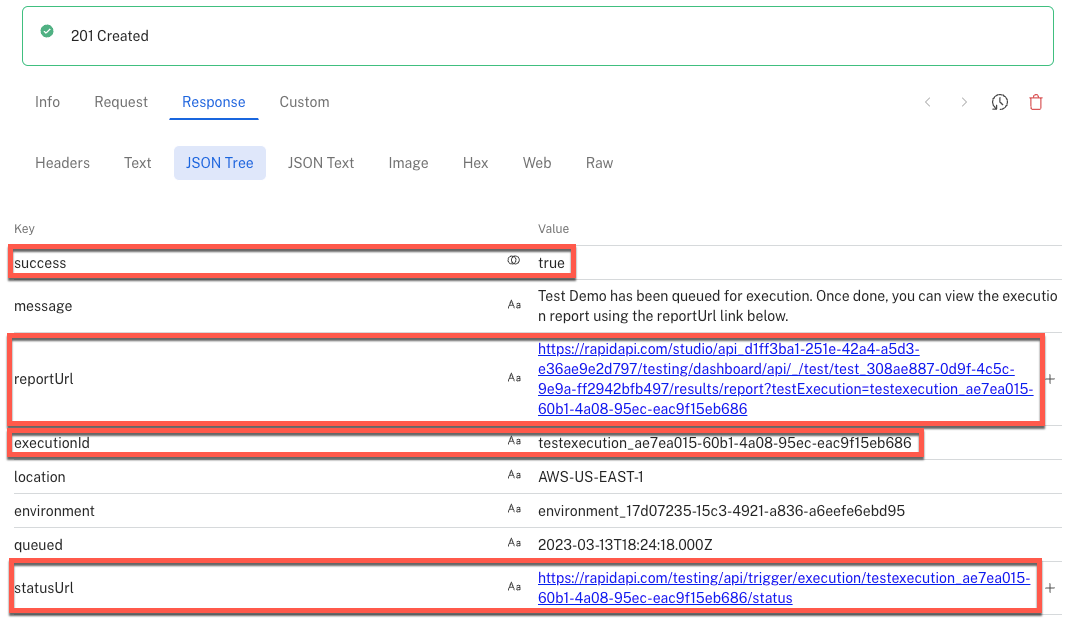
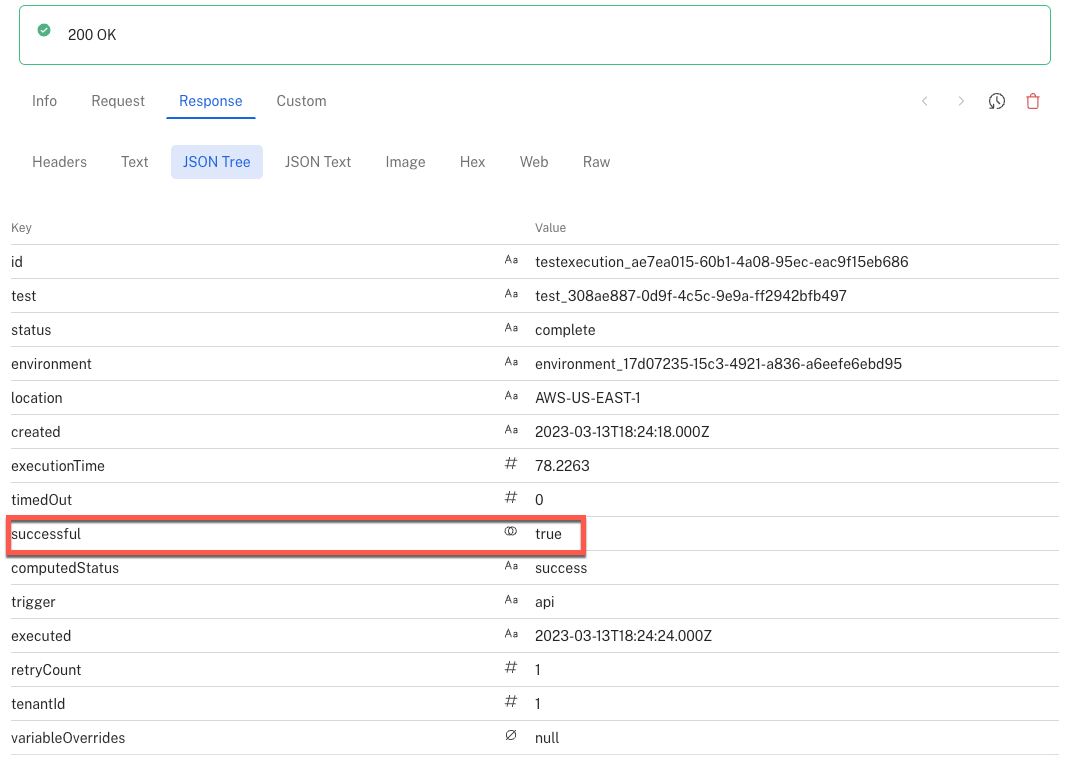
Sending a request to the trigger just starts the test and then returns a status of 201. To view the results of the test, you will need to send a GET request to the statusURL in the trigger's response. This second request should return a status of 200 regardless of whether the test execution was successful. The value of the successful field in this response is what tells you the status of the test. The value of successful will be true if the test was successful and false if the test failed (see the screenshots below).

When you make the request to trigger the test execution through the webhook, you will get a few things in the response.
- success. This indicates whether or not the test was successfully triggered. Please remember that this is not an indicator of whether or not the test succeeded.
- reportUrl. This URL will take you to a test execution report in the UI. You will need to be logged in to see it.
- executionId. Each test execution comes with a unique execution ID.
- statusUrl. Make a GET request to this URL to determine whether your test was successful. You will get a response similar to the one below.

Environment variable override
You can define and use environment variables in RapidAPI Testing. Environment variables make it easier to store data commonly used across multiple tests and enables you to leverage one test definition in multiple environments. Define the environment variables once, and then use those variables from within your tests.
One powerful functionality of our trigger webhook is that it allows you to override the values of the environment variables on a per-execution basis. This enables you to be data-driven on your test executions by dynamically driving these values on each execution.
Let’s go through an example.
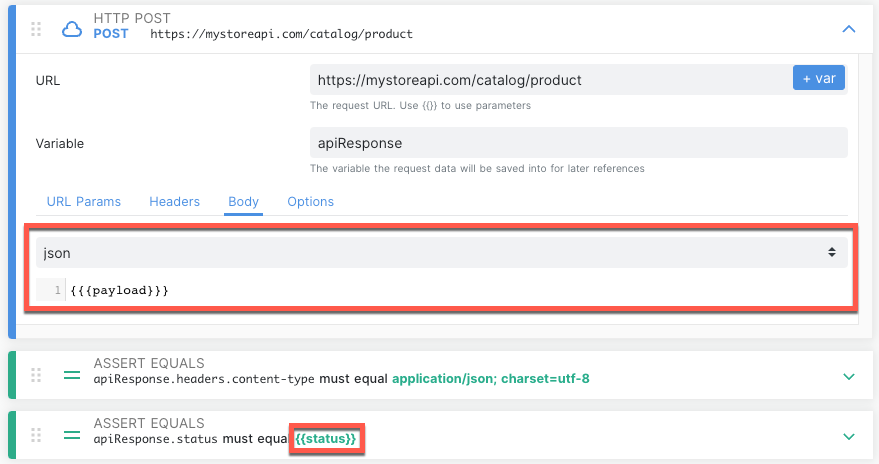
First, we need to define a test with environment variables in it. In the example below, we have two variables in the test.
- The first one is the payload of the POST request
- The second one is the {{status}} as the value of the assert equal step.

Using triple brackets for JSON dataNote that you should use triple brackets to encapsulate the payload variable (see the above screenshot). This ensures that the JSON payload does not get interpreted as an HTML entity.
Now, let’s override the values of payload and status when we run this test through the trigger webhook. We will do that by making a POST request to the trigger webhook and specifying the overrides in the payload. Remember, we need to do this through a POST request (not a GET request) because we need to include a payload with the overrides information.
For the above test, here is what our payload will look like.
{
  "baseContext": {
    "payload": "{\n  \"name\": \"string\",\n  \"price\": 0,\n  \"manufacturer\": \"string\",\n  \"category\": \"string\",\n  \"description\": \"string\",\n  \"tags\": \"string\"\n}",
    "status": "201"
  }
}
The payload takes an object called baseContext. In the baseContext object, you should include all the overrides as key-value pairs, the key being the environment variable name and the value being the environment variable value.
From here, we can make the POST request with the appropriate headers and payload above, and the tests will be executed with the overrides applied.
Updated 8 months ago