RapidAPI Consumer Quick Start Guide
Learn how to use the RapidAPI Hub to make your first API call and quickly integrate APIs into your application.
Sign up for a free RapidAPI account
You begin by signing up for a free RapidAPI account, assuming you don't already have one. An account is required to test APIs, integrate them into your application, and track analytics. Sign up from the RapidAPI home page by clicking the Sign Up button in the top right.
Discover the API(s) that work best for your application
The first thing you'll want to do is locate an API that you want to use. Let's find a translation API for this example. To get started, you can enter 'translation' in the search bar, which will return the top results for your search term.
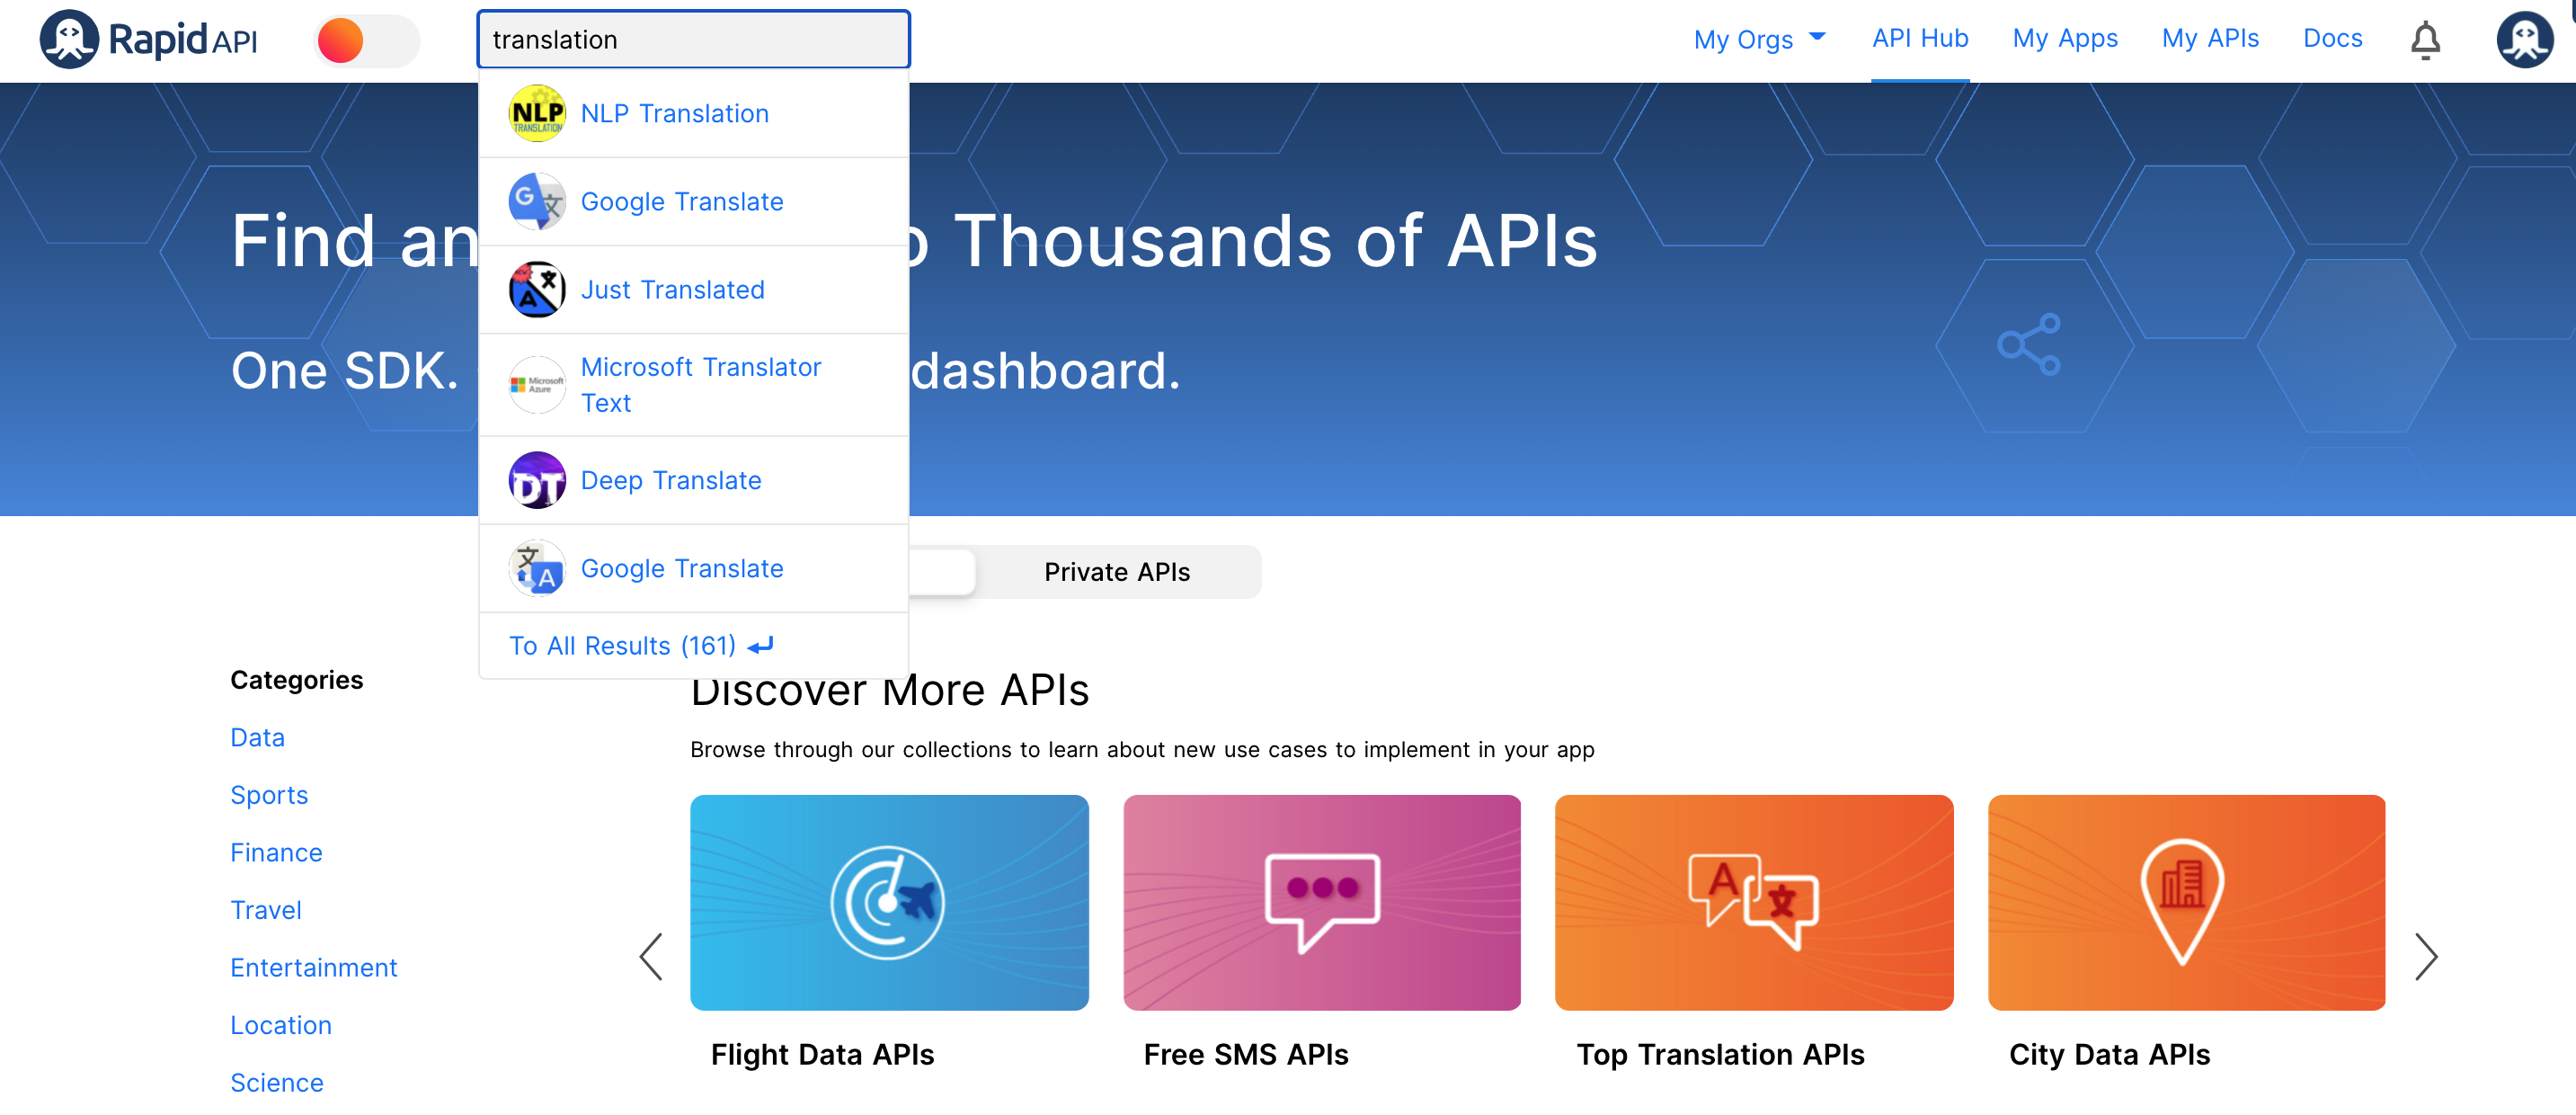
If you are just getting started with your project or don't know exactly what you are looking for, consider browsing the categories and collections of APIs on the homepage for some inspiration.
CategoriesEach API belongs to a single category, such as SMS or Translation. Categories are a mechanism used to help organize and discover APIs.
CollectionsA collection is a list of APIs that usually have a common characteristic, such Popular APIs or Free SMS APIs. A single API can belong to multiple collections. Collections on the RapidAPI Hub are managed by RapidAPI.
Advanced search and filtering
Press the Enter or Return key to complete the search. You will see collections and APIs that match your search. To refine the search, filter by categories, collections and/or tags.
TagsTags are name/value pairs that help identify an API. For example, you can select the Tags dropdown when searching and specify that you only want to return APIs with a tag name of API Type and a tag value of GraphQL.
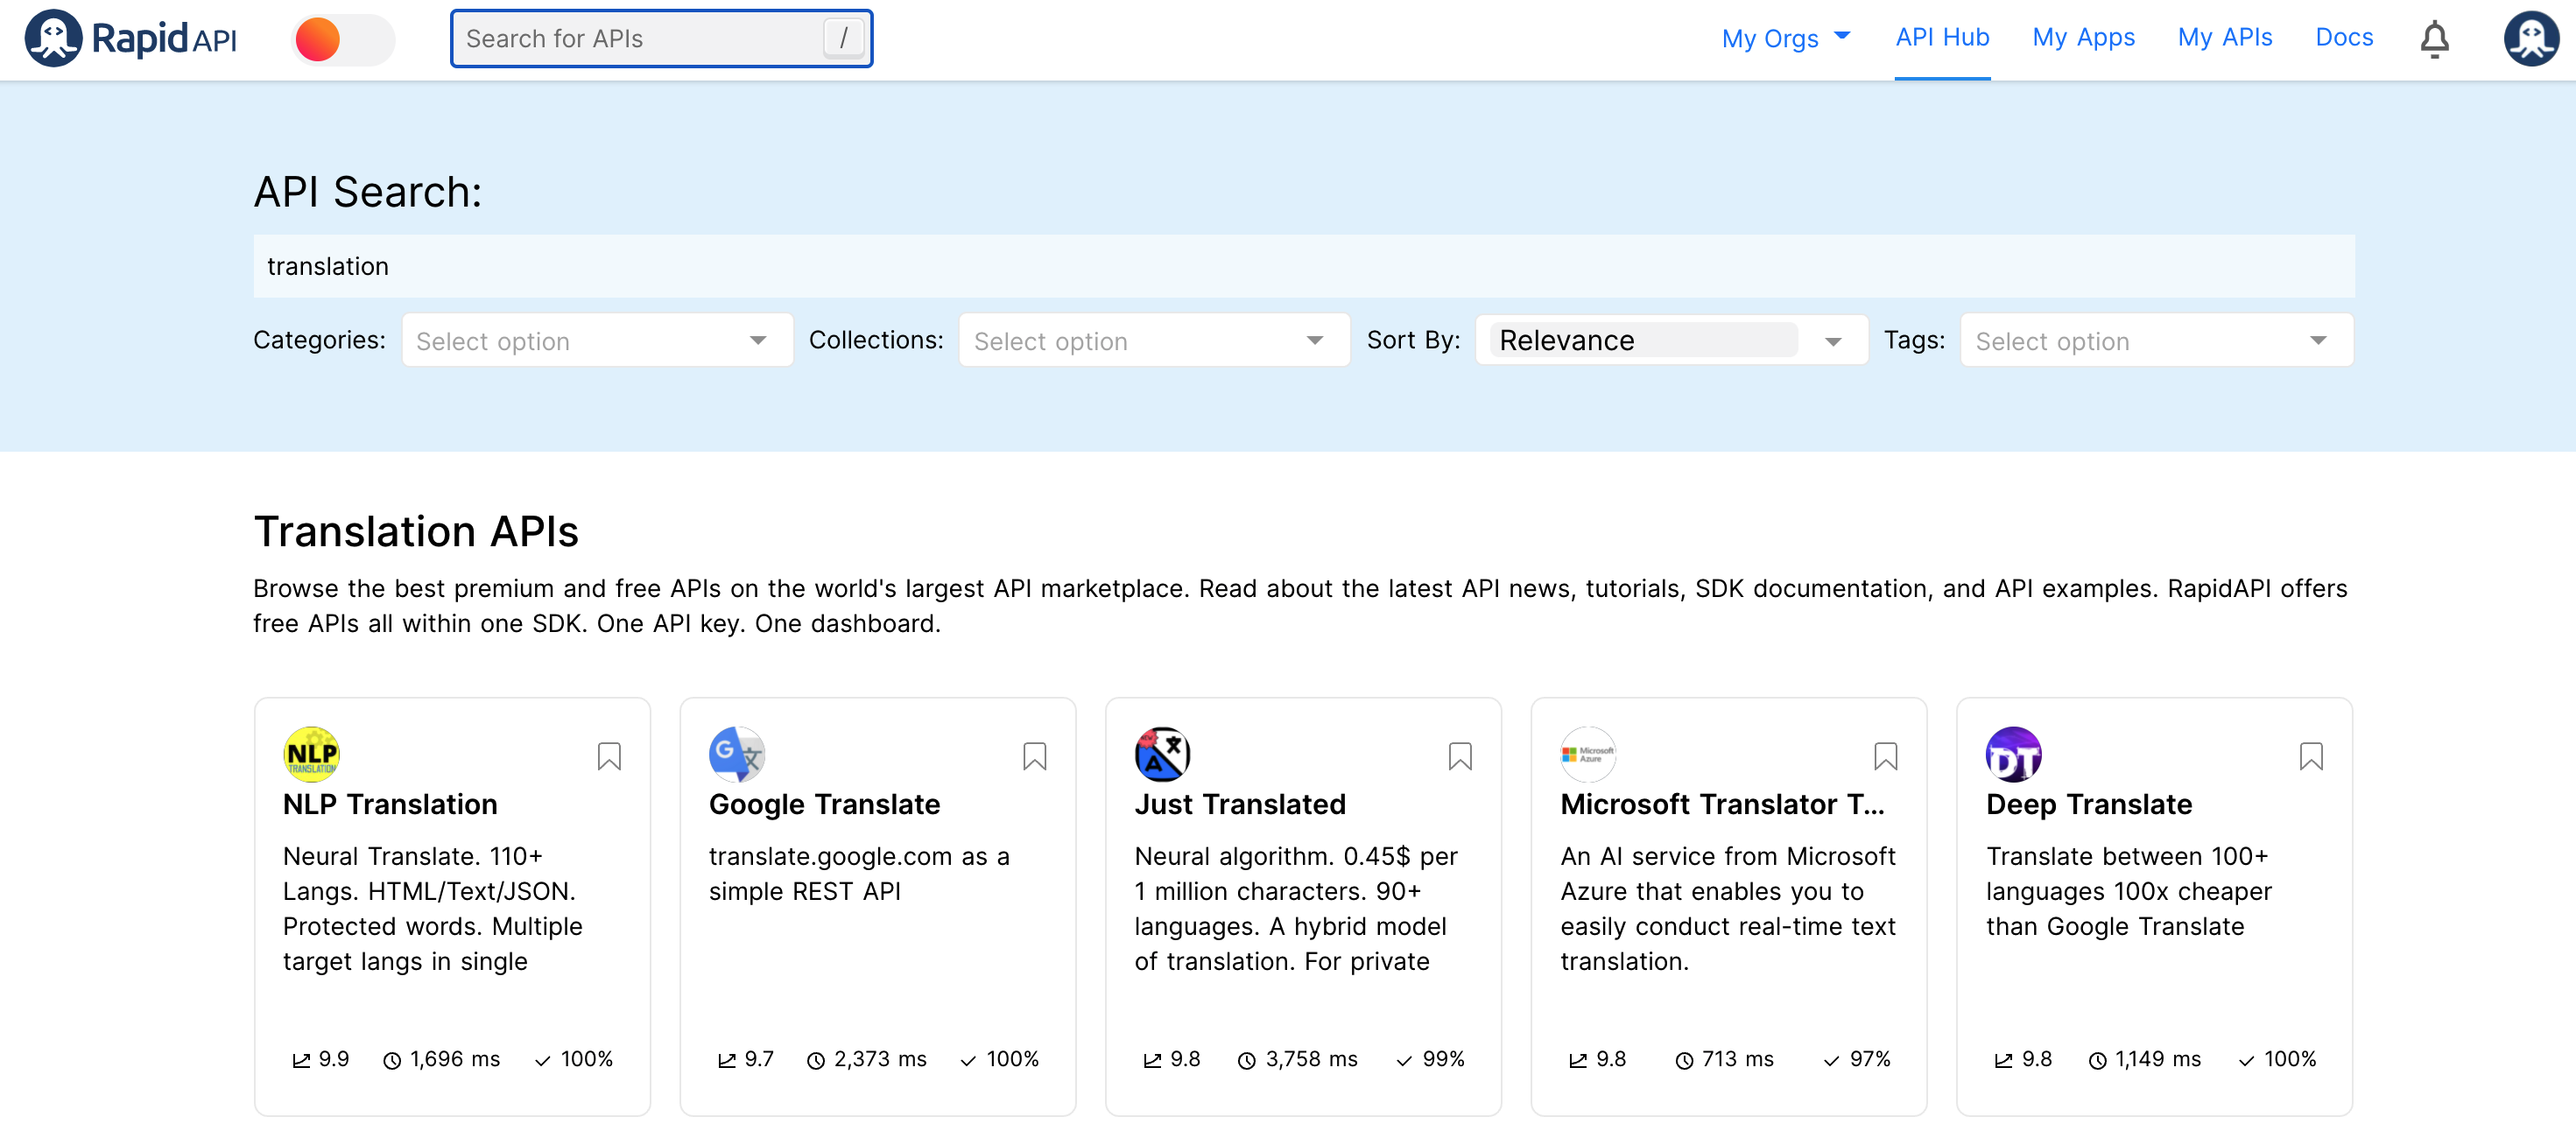
From the search results, you can select the API that best fits your needs using the information provided such as popularity score, average latency, and average success rate.
You can hover over a result to preview some of the most popular API endpoints and see if the API is Paid, Free, or Freemium. For this example, let's look at the Google Translate API.
API listing overview
Once you select your API, you are brought to the Endpoints tab of the API listing page. The Endpoints tab includes most of the information needed to get started with the API. It includes navigation, a list of endpoints, documentation of the currently selected endpoint, and code snippets to help you get started with your coding. The code snippets are available in many different programming languages.
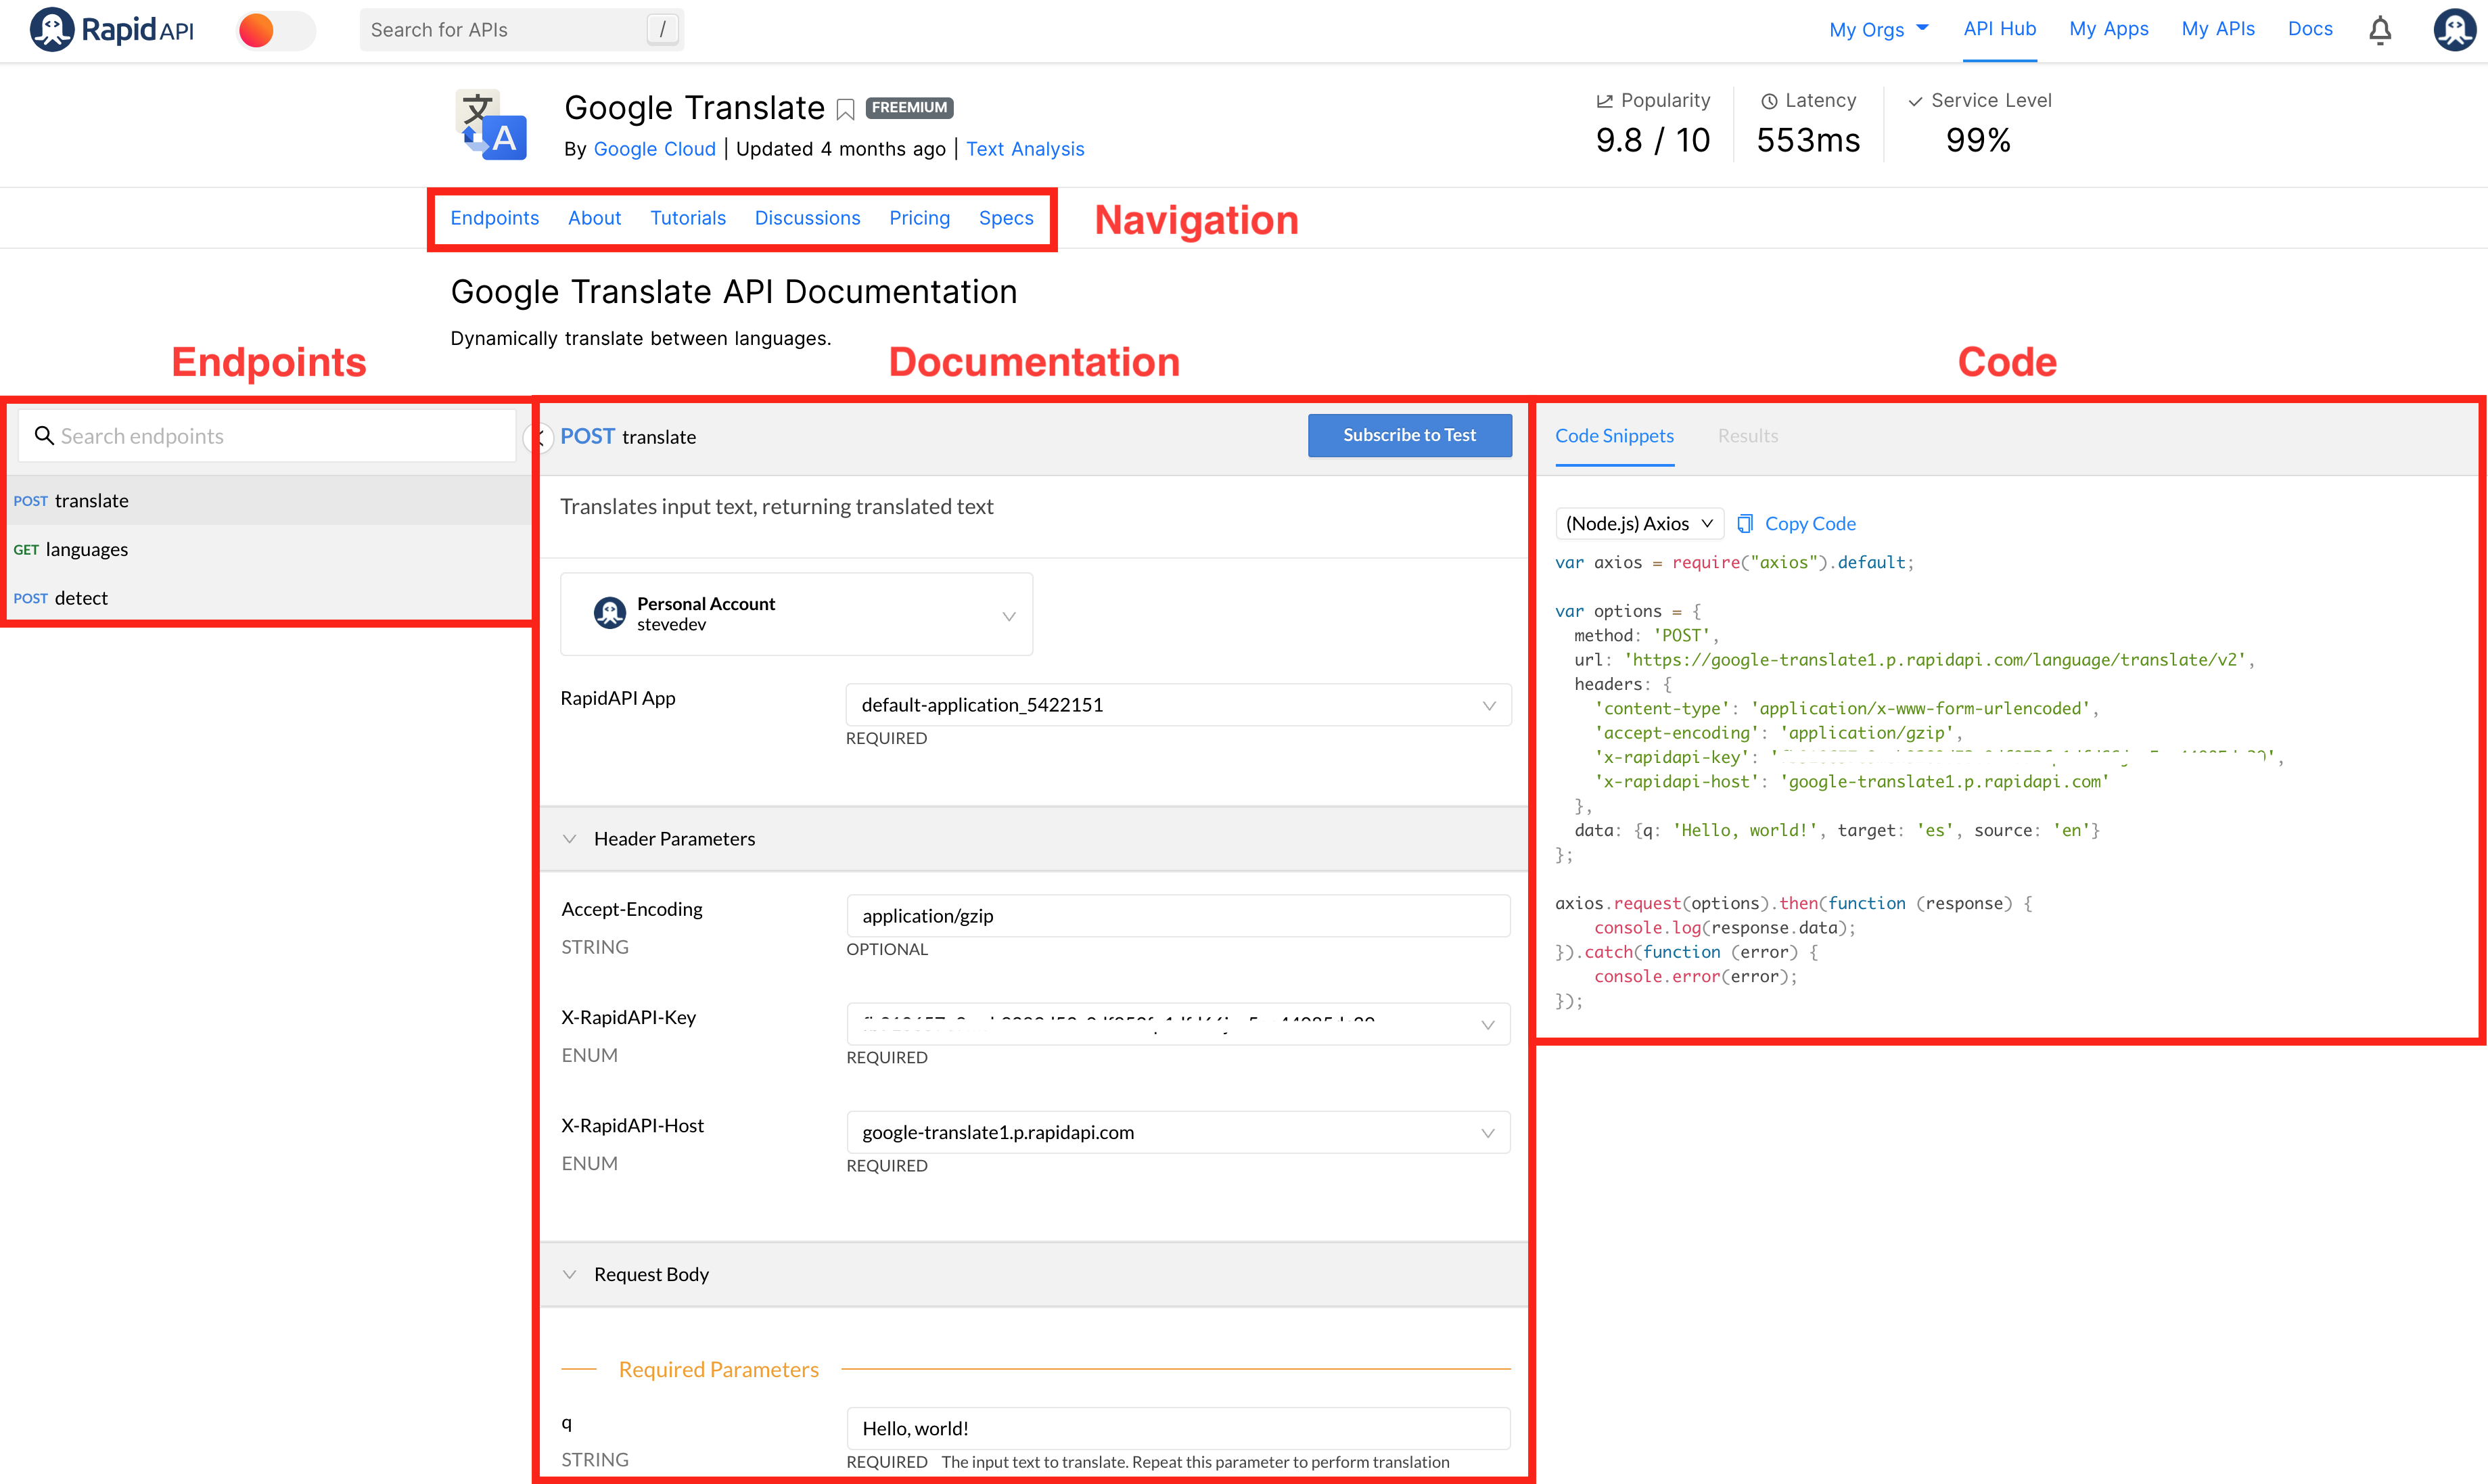
If the navigation bar for the API has a Pricing tab (see above for an example), you will need to subscribe to an API plan before making a request to the API.
API pricing plansYou can learn more about the different types of API pricing and how billing works here
Subscribing to an API
If the API has pricing associated with it, you will need to select a pricing plan before calling the API. Prices are based on a recurring monthly subscription based on the plan selected — plus overage fees applied if you exceed a plan’s quota limits.

A lot of APIs have a BASIC free plan, which means you can use that plan to test the API for free as long as you stay within the quota limits. It’s your responsibility to review and acknowledge the plan’s usage limitations.
Staying in your API plan's quota limitIt is extremely important to know how close you are to the quota limit for your subscription. You will be charged for any additional usage that goes over the limit. You can see your usage and remaining quota amount from the Developer Dashboard or by viewing the response headers when making a request.
Testing an API from the browser
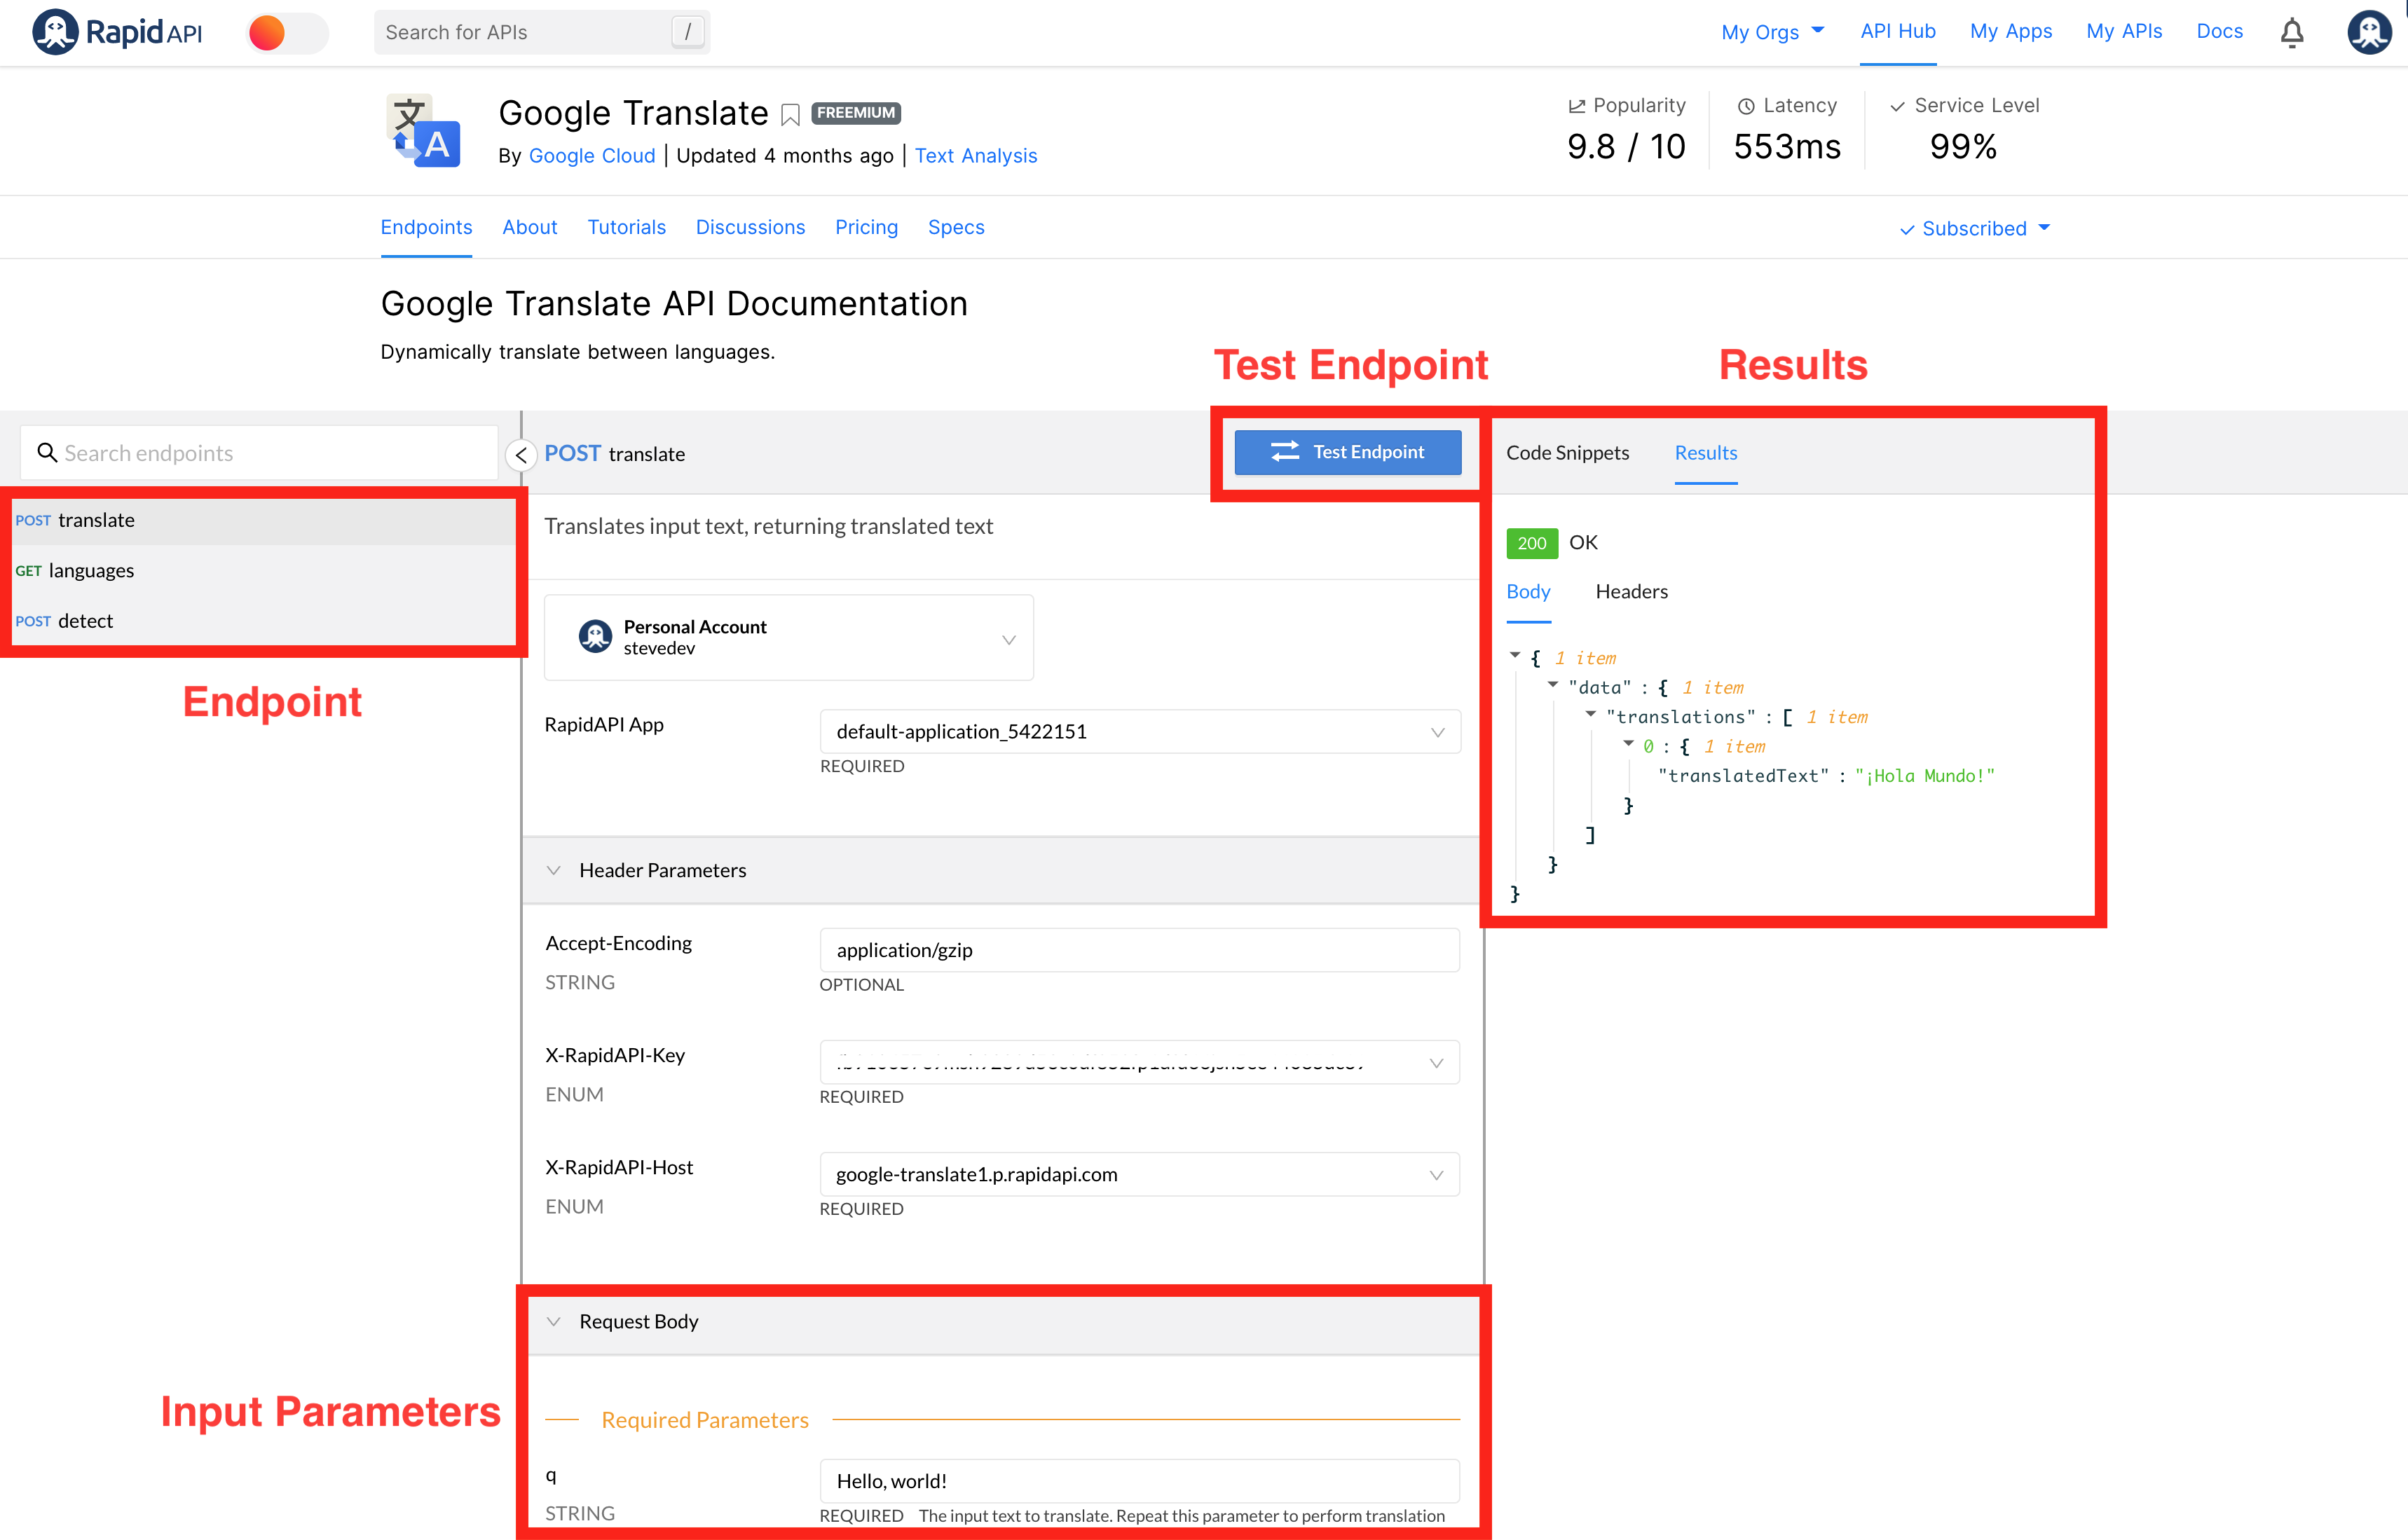
Now that you have subscribed to an API plan, you will want to head back to the Endpoints tab. From here you can test the API endpoint directly in the browser by changing the input for the endpoint. When you make a request to the API by using the Test Endpoint button, you will see the response directly in the browser.
Integrating the API into an application
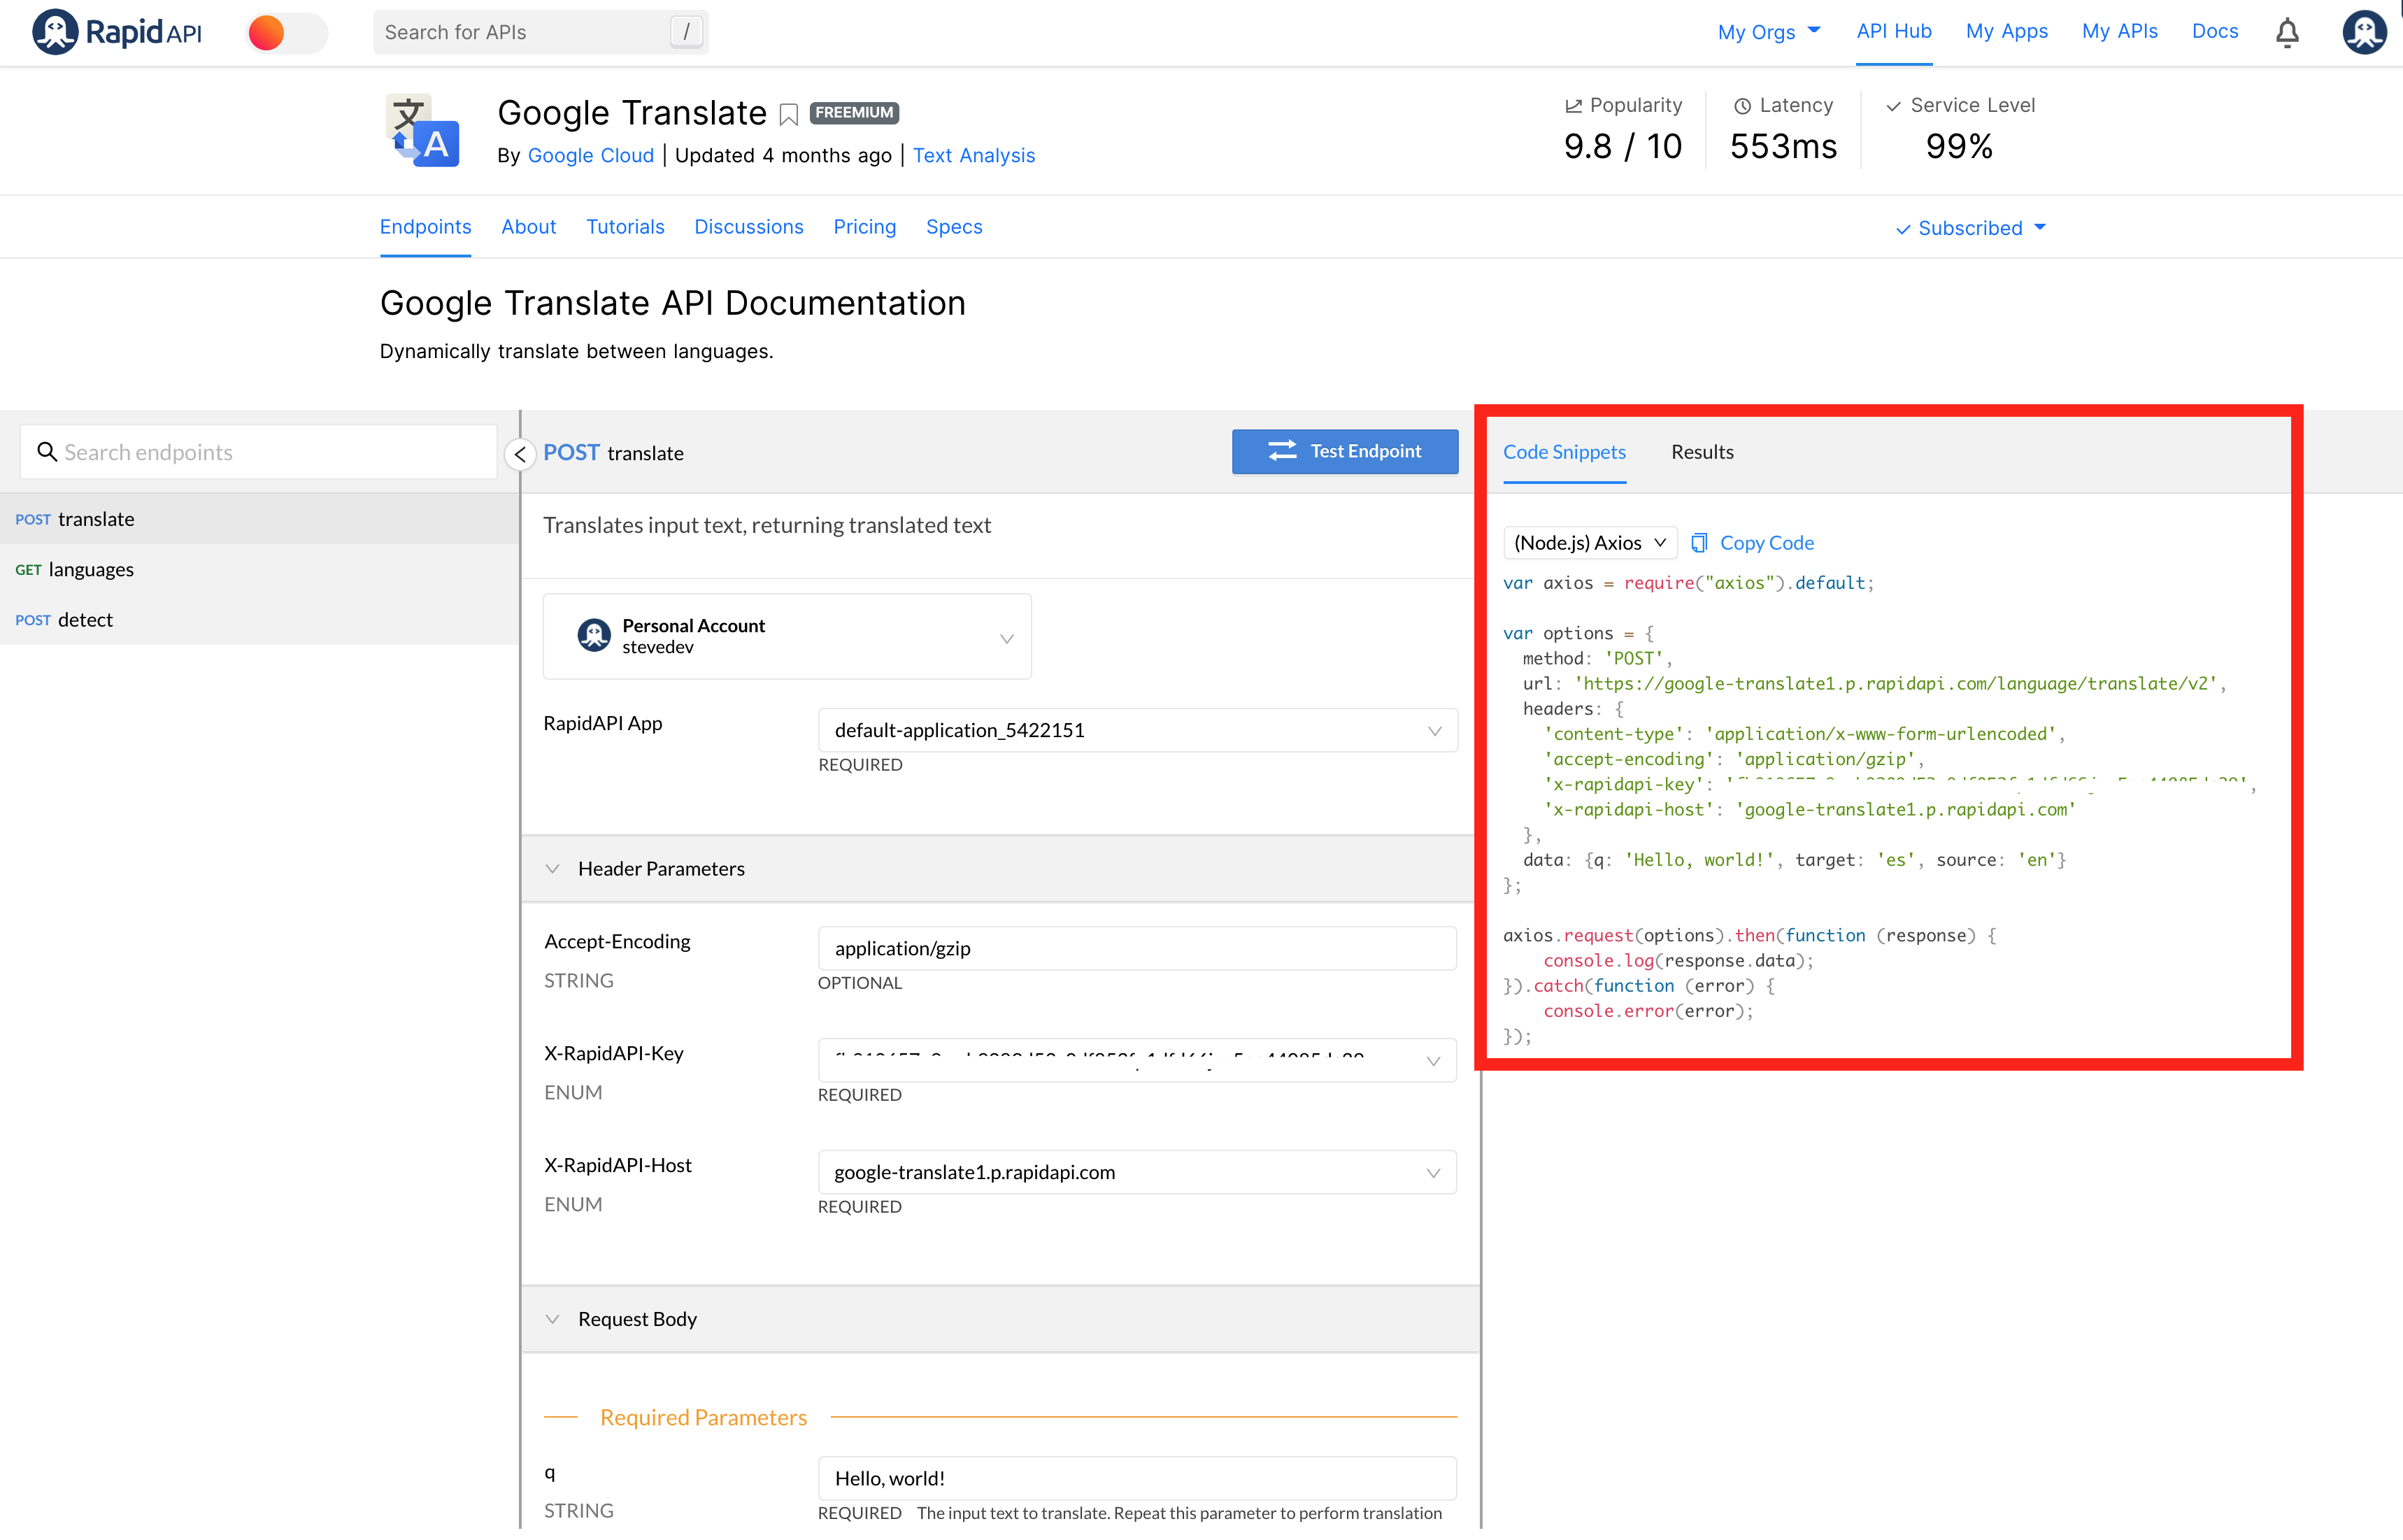
Once you find an API that you want to integrate into your application, switch to the Code Snippets tab. Select the programming language that your application is using and copy the code snippet right into your application code.
Updated 8 months ago